WordPress is one of the most widely used content management systems (CMS) in the world, known for its user-friendly interface and flexibility. A significant factor behind WordPress’s success is its extensive ecosystem of plugins. Plugins are powerful tools that extend the core functionality of your WordPress site. They allow users to add features ranging from contact forms and SEO enhancements to complete e-commerce functionality. Without plugins, many WordPress sites would be quite limited in what they could offer.
This article will guide you through the process of installing WordPress plugins, focusing on best practices and tips that can help you make the most out of this robust feature. From understanding the fundamentals of WordPress plugins to pre-installation checks, installation methods, and plugin management techniques, this guide is designed for both beginners and more experienced users who want to ensure their plugin installations are safe and effective.
Whether you are building a blog, an online store, or a business website, installing plugins the right way is crucial to maintaining a stable and high-performing site. Throughout this article, you’ll also learn how to handle common issues and conflicts, as well as the importance of keeping plugins up-to-date for security and performance.
By the end of this post, you’ll have a solid understanding of how to install, activate, deactivate, and troubleshoot plugins, making your WordPress experience even more seamless and enjoyable.
Understanding WordPress Plugins
To fully understand how to install and manage plugins, it’s important first to grasp what plugins are and how they work within WordPress. At its core, a plugin is a piece of software that you can install on your WordPress site to add specific features or functionality. Think of plugins as “apps” for your WordPress website that allow you to customize your site without the need for extensive coding knowledge.
A. What Are WordPress Plugins?
A WordPress plugin is essentially a collection of code that enhances or modifies the behavior of your website. These plugins can be simple, like a contact form plugin, or more complex, such as a full-fledged e-commerce store solution like WooCommerce. There are thousands of plugins available for every possible functionality, from improving site security to adding multimedia capabilities, and even enabling social sharing.
Plugins are written in PHP, the programming language that WordPress is built on. When you install a plugin, it integrates with your existing WordPress site by modifying your site’s database or adding new scripts. Once installed, plugins typically appear as a menu item within the WordPress admin dashboard, where you can configure the plugin’s settings.
B. Types of WordPress Plugins
WordPress plugins come in two major types: free and premium. Free plugins can be downloaded directly from the official WordPress plugin repository, while premium plugins are generally sold by third-party developers and can offer more advanced features.
Free Plugins: These are the most common types of plugins and are available in the official WordPress plugin directory. Most free plugins are simple and provide basic functionality, such as contact forms, image sliders, or social sharing buttons. While free plugins can meet the needs of many users, they may have limitations in terms of support, features, or customization.
Premium Plugins: Premium plugins offer more advanced features, extended support, and regular updates. These plugins are typically purchased through third-party websites or marketplaces, like CodeCanyon or the developers’ own sites. Premium plugins are generally more reliable and are often used by businesses and professional WordPress developers. They tend to be feature-rich and can be highly customizable to meet specific needs.
Must-Have Plugins: Certain plugins are essential for most WordPress websites. These include plugins for SEO (like Yoast SEO), caching (such as W3 Total Cache), security (like Wordfence), and performance optimization. No matter what type of site you’re building, these core plugins help ensure that your site is secure, fast, and optimized for search engines.
C. Why You Need Plugins
Plugins are what allow WordPress to serve a wide variety of purposes. Without plugins, your website would be limited to just the basic functionality that comes with the default WordPress installation. By adding plugins, you can transform a simple blog into a powerful e-commerce platform, an online portfolio, or a dynamic social community site.
Plugins make WordPress incredibly flexible. For example, if you want to add a contact form, rather than manually coding it yourself, you can install a plugin like Contact Form 7, which handles all the complexities for you. Similarly, plugins like Akismet prevent spam comments, while others help with backup automation, data analytics, and site security.
Plugins help make WordPress sites scalable and manageable by non-developers. Even if you lack coding experience, plugins enable you to add sophisticated features to your site without needing to hire a developer.
Pre-Installation Considerations
Before you dive into installing plugins, there are a few important pre-installation considerations that can help you avoid problems down the line. Installing plugins without proper planning can lead to performance issues, security risks, or conflicts between different plugins.
A. Backing Up Your Website
One of the first things you should always do before installing any plugin is to back up your website. While the installation of most plugins is straightforward and safe, there’s always a small risk that something could go wrong. If the plugin conflicts with your theme or another plugin, or if it causes an error that takes down your site, a backup will allow you to restore everything to its previous state.
There are many ways to back up your WordPress site. You can use a plugin like UpdraftPlus or BackupBuddy, both of which make it easy to create and restore backups. Alternatively, some hosting providers offer automatic backups, so be sure to check with your host before proceeding.
B. Checking WordPress Compatibility
Another important consideration is the compatibility between the plugin and your version of WordPress. WordPress is regularly updated, and not all plugins are immediately compatible with the latest version. Installing a plugin that’s incompatible with your version of WordPress can cause issues, such as broken functionality or site crashes.
When choosing a plugin, always check the plugin’s details page to confirm that it is compatible with the version of WordPress you are using. The plugin’s page will usually display a list of compatible WordPress versions, so it’s easy to check if the plugin will work with your setup.
C. Evaluating Plugin Reviews and Ratings
Before installing any plugin, take the time to read reviews and check the plugin’s ratings. WordPress plugins are typically rated by users who have already installed them, and these ratings can be an excellent indicator of the plugin’s quality. Look for plugins with a high rating (generally 4 stars or above) and read through user reviews to get a sense of any issues people have faced.
Also, consider the frequency of updates for the plugin. A plugin that hasn’t been updated in over a year may not be compatible with the latest version of WordPress, and it could present security risks. You should always choose plugins that are actively maintained and have a track record of reliable updates.
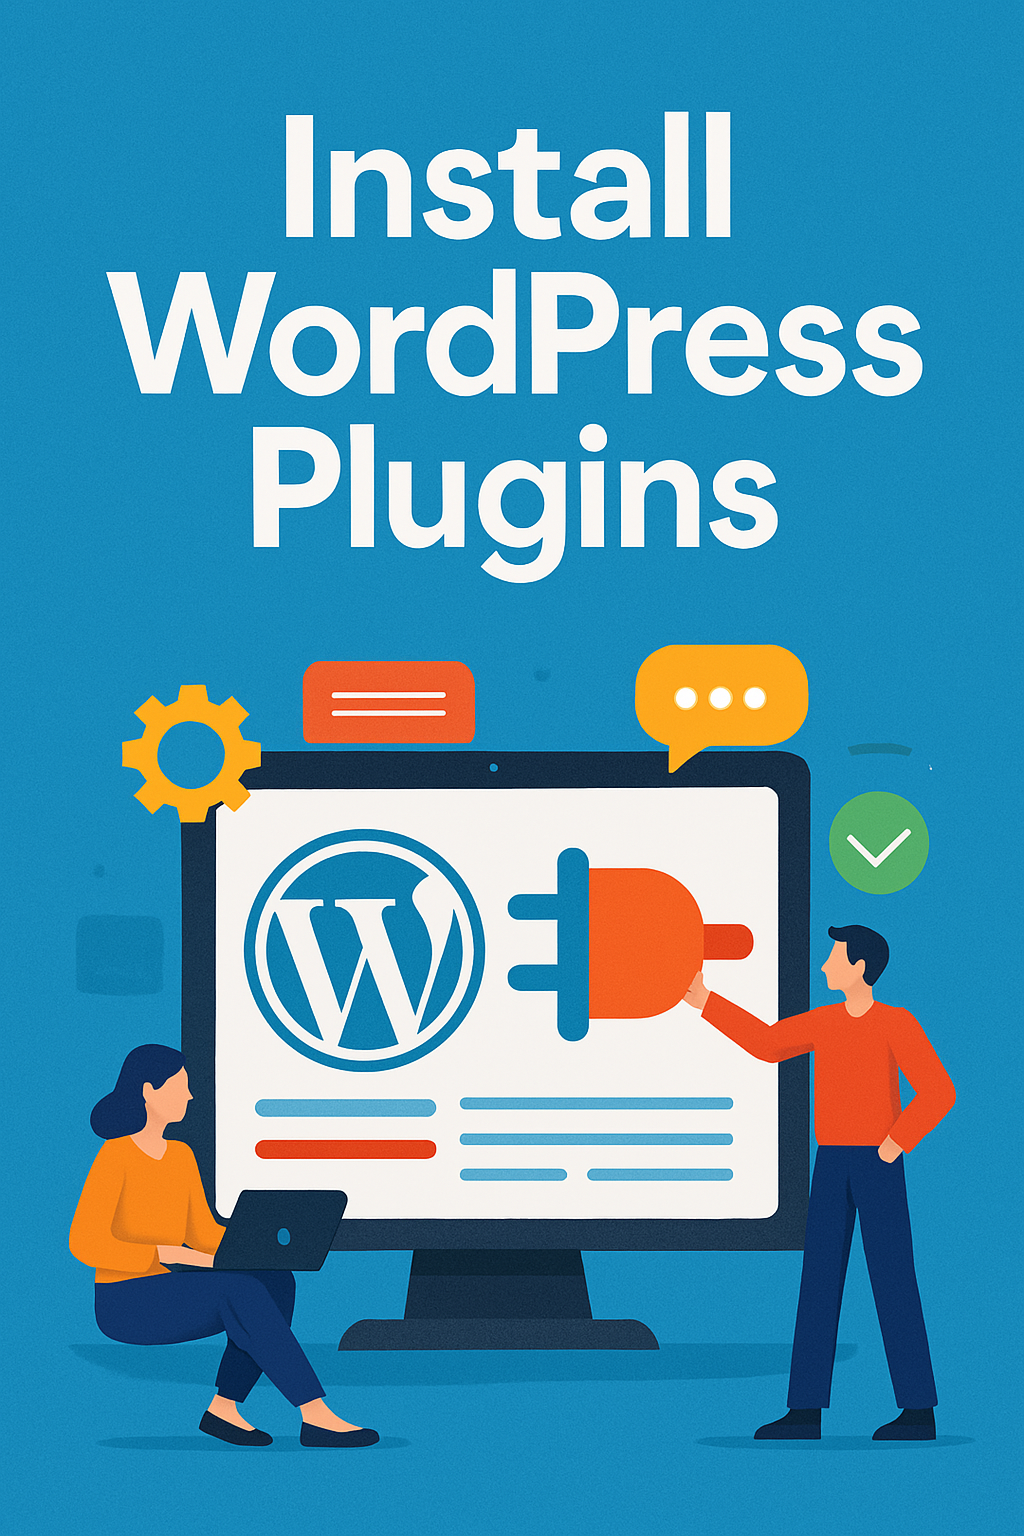
How to Install Plugins in WordPress
Once you’ve taken the necessary pre-installation steps, it’s time to install the plugin. There are several ways to install plugins in WordPress, and the method you choose will depend on whether you’re installing a free plugin from the WordPress repository or a premium plugin that you’ve downloaded from an external source.
A. Installing via the WordPress Dashboard
The most common method of installing plugins is through the WordPress dashboard. This method is fast, easy, and works for most free plugins available in the official WordPress plugin repository.
Here’s how to do it:
- From your WordPress dashboard, go to Plugins > Add New.
- In the search bar, type the name of the plugin you want to install (e.g., “Yoast SEO”).
- Once the plugin appears, click the Install Now button next to it.
- After the installation is complete, click the Activate button to begin using the plugin.
B. Uploading a Plugin Manually
If you’ve purchased a premium plugin or downloaded a plugin from a source outside of the WordPress repository, you’ll need to upload it manually. Most premium plugins will come in a .zip file that you can upload directly from the WordPress dashboard.
Here’s how:
- Go to Plugins > Add New > Upload Plugin.
- Click Choose File and select the .zip file of the plugin.
- Click Install Now and then click Activate once the plugin has been installed.
C. Installing via FTP (Advanced)
For more advanced users, it’s possible to install plugins via FTP. This method is useful if you encounter issues with the plugin upload process through the dashboard or if you need to install a large plugin.
To install a plugin via FTP:
- Download the plugin .zip file and extract it.
- Using an FTP client like FileZilla, connect to your server and navigate to the wp-content/plugins folder.
- Upload the extracted plugin folder to this directory.
- Once the upload is complete, go to your WordPress dashboard and activate the plugin.
Activating and Deactivating Plugins
Once a plugin is installed, the next step is activation. Activation enables the plugin to integrate with your WordPress site and begin adding its features. In addition to activating plugins, you’ll also need to know how to deactivate plugins, whether temporarily or permanently, for troubleshooting or performance optimization.
A. Activating Plugins
Activating a plugin is simple and straightforward. After installation, WordPress will prompt you to activate the plugin. You can also activate plugins at any time by going to Plugins > Installed Plugins in your dashboard. Simply find the plugin you wish to activate and click the Activate link under the plugin’s name.
Most plugins will automatically add an option in your dashboard menu for configuration, where you can tweak settings. Some plugins, like those for security or SEO, may require you to configure them before they start functioning.
B. Deactivating Plugins
Deactivating a plugin is just as easy as activating it. You might want to deactivate a plugin temporarily to troubleshoot issues, test compatibility, or reduce your site’s load. To deactivate a plugin, go to Plugins > Installed Plugins and click the Deactivate link under the plugin’s name.
When you deactivate a plugin, it will stop running, but it will remain installed on your site. You can reactivate it at any time.
C. Troubleshooting Activation Issues
Sometimes, a plugin may fail to activate properly. This could be due to conflicts with your theme, another plugin, or your WordPress configuration. If you encounter issues, try deactivating other plugins one by one to isolate the conflict. If the issue persists, check the plugin’s support forum or documentation for troubleshooting tips.
Configuring Plugin Settings
Once a plugin is activated, many plugins will require configuration to ensure they work as intended. Configuration can vary significantly depending on the plugin’s purpose, from setting up SEO parameters to adjusting a contact form’s settings. Understanding how to configure plugins properly can save you time and improve the effectiveness of the plugin on your website.
A. Finding Plugin Settings
Most plugins add a settings link directly within the WordPress dashboard. Depending on the plugin, you may find these settings in the Settings section of your admin panel, or the plugin may have its own menu item in the sidebar. Some plugins even add a settings tab directly on the plugin page under Plugins > Installed Plugins.
For instance, if you installed a popular SEO plugin like Yoast SEO, you would find its settings under the “SEO” tab in the WordPress dashboard. The same goes for plugins that handle caching, security, backups, and social sharing. Once you locate the settings, click on them to open the configuration page.
It’s important to note that some plugins come with a setup wizard that guides you through the configuration process when you first activate the plugin. These wizards can be extremely helpful for beginners as they ensure that all the basic settings are configured properly.
B. Best Practices for Configuring Plugins
Read the Documentation: While many plugins come with a setup wizard, it’s always a good idea to check the plugin documentation before making changes. Good documentation will often highlight important settings and explain the features that you may not immediately understand. This ensures that you’re using the plugin to its fullest potential.
Use Default Settings When in Doubt: If you’re unsure about a specific setting, it’s often best to leave it as is. Plugins typically have default settings that work well for most users. If you change too many settings at once without understanding their impact, you may unintentionally break your site.
Avoid Overcomplicating Settings: Many advanced plugins, especially SEO or security plugins, have a wide range of settings that can seem overwhelming. For most small to medium-sized websites, it’s best to keep things simple. Stick to the basic settings unless you have a specific need for more advanced features.
Enable Automatic Updates: If available, enabling automatic updates for your plugin can save you the hassle of manually checking for updates. It’s one of the best practices for maintaining plugin security and ensuring the plugin is always running with the latest features.
Test Plugin Features Before Going Live: Before fully enabling a plugin on your live site, test its features on a staging environment. This is particularly important for plugins that modify your site’s appearance or functionality. It allows you to identify any issues before they impact your users.
C. Avoiding Plugin Conflicts
One of the biggest challenges when configuring plugins is dealing with potential conflicts. Sometimes, two plugins may not work well together, which can lead to errors or unexpected behavior on your site. For example, a caching plugin may conflict with an image optimization plugin, causing images to not display correctly.
To avoid plugin conflicts:
Test Plugins in Isolation: After installing a new plugin, deactivate all other plugins and check if the issue persists. This will help you identify whether the problem is due to a conflict.
Update Plugins Regularly: Conflicts often arise when plugins are outdated and no longer compatible with the latest version of WordPress or other plugins. Always ensure your plugins are up-to-date to avoid compatibility issues.
Use Well-Coded Plugins: Choosing high-quality, well-coded plugins minimizes the risk of conflicts. Check plugin reviews, ratings, and changelogs to determine if the plugin is actively maintained and well-supported.
D. Configuring Advanced Settings
Some plugins offer advanced configuration options, allowing you to tweak settings that go beyond the basic functionality. For example, SEO plugins let you customize meta descriptions, titles, and XML sitemaps, while security plugins might offer firewall settings, malware scanning, and login attempts restrictions.
When configuring advanced settings:
Understand What Each Setting Does: Don’t change advanced settings unless you’re comfortable with what they do. Some settings can have significant impacts on your site’s performance or security.
Backup Settings Before Changes: If you’re changing important configurations, such as security settings, always backup your settings or take screenshots. This way, you can revert to the original configuration if something goes wrong.
E. Troubleshooting Configuration Issues
Occasionally, plugins might not behave as expected after configuration. In such cases:
Check for Conflicts: Use the method mentioned above to test the plugin with other plugins disabled. This helps in determining if another plugin is causing the issue.
Revert to Default Settings: Many plugins offer a “reset” option that reverts settings back to their default configuration. This is helpful if you’ve made changes and aren’t sure where the issue lies.
Use Plugin Support: If the issue persists, check the plugin’s support forum or contact the plugin developer for assistance. Well-established plugins usually have active communities and responsive support teams.
Keeping Plugins Up-to-Date
Keeping plugins up-to-date is one of the most important aspects of plugin management. WordPress plugins are updated frequently, often with bug fixes, security patches, and new features. Failing to update your plugins can lead to compatibility issues, security vulnerabilities, and decreased performance.
A. Importance of Regular Updates
Security: Plugins are a common target for hackers, especially those that are outdated. Plugin developers regularly release updates to patch security vulnerabilities. By keeping plugins updated, you ensure your site remains protected from threats.
Performance: Updates often include performance improvements, bug fixes, and new features. By updating your plugins, you ensure that your site runs smoothly and efficiently.
Compatibility: As WordPress and other plugins update, older plugins may stop working correctly if they’re not kept up-to-date. Regular updates ensure that your plugins remain compatible with the latest version of WordPress and other tools you use.
B. How to Update Plugins
Updating plugins in WordPress is straightforward:
Automatic Updates: Some plugins offer automatic updates. When this option is enabled, the plugin will update itself when a new version is released. This is an easy and convenient way to ensure your plugins are always up-to-date.
Manual Updates: If automatic updates aren’t enabled, you’ll need to update plugins manually. To do this, go to Dashboard > Updates, and you’ll see a list of plugins that have available updates. From there, you can select which plugins to update and click the Update Plugins button.
One-Click Updates: If you have multiple plugins that need updating, WordPress also allows you to update them all at once by selecting the Select All option and clicking Update Plugins.
C. Troubleshooting Plugin Update Issues
Sometimes, updating a plugin can result in issues such as broken functionality or a white screen of death. If this happens:
Rollback the Update: Some plugins allow you to revert to a previous version in case of issues. Use a plugin like WP Rollback to roll back to a previous plugin version.
Deactivate and Reactivate: After an update, deactivate the plugin and then reactivate it. This can often fix any issues caused by the update.
Test After Updates: Always test your site after updating plugins to ensure everything is working as expected. This is especially important if the update includes significant changes.
D. Best Practices for Plugin Updates
Test on a Staging Site: Before updating plugins on your live site, it’s a good practice to first test updates on a staging environment. This ensures that updates don’t cause unexpected issues on your live site.
Keep Track of Updates: Some users prefer to update plugins as soon as updates are available, while others wait until they see feedback from the community. If you choose to wait, be sure to track the update releases to ensure you don’t miss any important patches.
Consider Using Managed WordPress Hosting: Some managed WordPress hosting providers take care of plugin updates for you, which can save time and ensure your plugins stay updated without manual intervention.
Managing Plugins Effectively
While plugins can significantly enhance the functionality of your WordPress website, managing them effectively is key to maintaining a fast, secure, and stable site. Unchecked plugin growth can lead to slow page loads, security risks, and unnecessary complications.
A. Plugin Performance Impact
The more plugins you install, the more strain you put on your website’s performance. Some plugins, particularly those with complex features or poorly optimized code, can significantly slow down your site. When you install a plugin, make sure to monitor how it affects your website’s speed.
Use a Caching Plugin: Caching plugins like W3 Total Cache or WP Super Cache can help reduce the load time of your site, especially if you use multiple plugins. Caching stores static versions of your site’s pages and serves them to visitors, reducing the amount of work the server needs to do for each page load.
Regularly Test Your Site’s Speed: Use tools like GTmetrix or Google PageSpeed Insights to test your site’s load time. If you notice that your site is slowing down, investigate which plugins might be causing the issue.
B. Using Only Necessary Plugins
One of the best practices for managing plugins effectively is to keep only the plugins that are essential for your site’s functionality. If you have plugins that you no longer use, deactivate and delete them. Even inactive plugins can pose security risks, as they might not receive updates.
Before installing a new plugin, ask yourself whether it’s truly necessary. For example, if you already have a contact form plugin, do you really need another one? By being selective, you’ll reduce bloat and improve your site’s performance.
C. Monitoring Plugin Health
Regularly check the health of your plugins by ensuring they are up-to-date and compatible with your WordPress version. Use tools like WP Health Check or plugin-specific checkups to identify any issues.
Security and WordPress Plugins
WordPress plugins can greatly enhance the security of your website, but they can also introduce security vulnerabilities if not carefully managed. Ensuring that plugins are secure is essential for protecting your site from malicious attacks.
A. Choosing Secure Plugins
Source of Plugins: Always download plugins from reputable sources, such as the official WordPress Plugin Repository. Avoid downloading plugins from sketchy third-party websites, as these may contain malicious code.
Active Updates and Support: Check the plugin’s update history and support forums to ensure that it’s actively maintained and supported. Plugins that haven’t been updated in a while may have security vulnerabilities that can be exploited by attackers.
Security Plugins: Install a security plugin like Wordfence or Sucuri to monitor your website for malware, brute-force attacks, and other security threats. These plugins offer features like firewalls, malware scanning, and real-time monitoring.
B. Regularly Scanning for Vulnerabilities
Even the most secure plugins can be vulnerable if left unchecked. Make it a habit to regularly scan your website for security vulnerabilities, especially after installing a new plugin. Use security plugins that offer vulnerability scanning or employ third-party services for additional peace of mind.
Troubleshooting Plugin Issues
Despite the convenience and functionality that plugins bring to WordPress, they can sometimes cause issues that disrupt the normal operation of your website. Problems can range from minor bugs to major site crashes, often stemming from plugin conflicts, outdated versions, or incorrect configurations. Knowing how to troubleshoot plugin issues is an essential skill for any WordPress user.
A. Common Plugin Issues
Plugin Conflicts: As discussed earlier, plugins can sometimes conflict with each other. These conflicts often occur when two plugins attempt to modify the same functionality or resources, leading to unpredictable behavior. For example, a caching plugin might conflict with an image optimization plugin, causing images not to load properly.
White Screen of Death (WSOD): One of the most frustrating issues WordPress users can face is the infamous “White Screen of Death.” This error occurs when a plugin (or combination of plugins) causes a fatal error in your WordPress website, preventing it from loading. A blank white page typically indicates a PHP error, often triggered by a poorly coded or outdated plugin.
Slow Site Performance: Some plugins can negatively affect site performance. This might be due to inefficient code, database queries, or excessive server resources. A slowdown in page load times or spikes in CPU usage can be signs that one or more plugins are not optimized for performance.
Broken Features: After installing a new plugin, certain features of your website might stop working correctly. For example, a plugin that modifies your theme’s header could inadvertently break the navigation menu or sidebar. These issues often stem from plugins not being properly integrated with your theme or other installed plugins.
Plugin Not Activating: Occasionally, a plugin might fail to activate properly, either due to conflicts, an incomplete installation, or an error with the server configuration. In these cases, the plugin won’t appear in your WordPress dashboard, and you won’t be able to use its features.
B. Step-by-Step Troubleshooting Guide
When troubleshooting plugin issues, follow a systematic approach to isolate the problem and find a solution. Here’s a step-by-step guide to help you get started:
Deactivate All Plugins: The first step in troubleshooting plugin issues is to deactivate all plugins. Go to Plugins > Installed Plugins, select all plugins, and click Deactivate. If your site starts working again, the problem is likely related to one of the plugins. You can then reactivate each plugin one by one to identify the culprit.
Switch to a Default Theme: Sometimes, plugin issues are caused by conflicts with your active theme. To rule this out, switch your site’s theme to one of the default WordPress themes, like Twenty Twenty-One. If the issue disappears, the problem may lie within your theme’s compatibility with the plugin.
Check Plugin Compatibility: Ensure the plugins you’re using are compatible with your current version of WordPress. If a plugin is outdated or incompatible, it may cause errors. Check the plugin’s changelog and support forums for information about compatibility. If it’s a known issue, you may find a solution or a plugin update that resolves it.
Enable Debugging Mode: WordPress has a built-in debugging tool that can help you identify errors caused by plugins. You can enable debug mode by editing your wp-config.php file
Clear Caches: If you are using caching plugins, make sure to clear your cache after making any changes. Sometimes, old cached versions of your website can cause issues, even after you deactivate or update a plugin. Clear both your browser cache and your website cache to ensure you are seeing the most recent version.
Check Plugin Logs: Many plugins have logging features that allow you to view error logs. This can help you identify the exact cause of the issue. For example, security plugins often log failed login attempts or other suspicious activities that could lead to errors. Review these logs for insights into what’s going wrong.
Rollback the Plugin Version: If an update to a plugin causes issues, you can try rolling back to a previous version of the plugin. Some plugins allow you to do this directly from the WordPress dashboard. Alternatively, you can use a plugin like WP Rollback to revert to an earlier plugin version.
C. Using the Plugin Support Forum
If you can’t resolve the issue on your own, don’t hesitate to seek help from the plugin’s support community. Most popular plugins have active support forums where users can report problems and receive assistance. You can also reach out to the plugin developer for help.
Before posting on the support forum, make sure to include relevant details, such as:
- WordPress version and plugin version
- A detailed description of the issue and what you’ve tried so far
- Any error messages or logs
- The theme and other plugins installed on your site
D. Dealing with Critical Errors (White Screen of Death)
If your site has crashed and is showing a blank white page, you might be dealing with a critical error caused by a plugin. In such cases, you can try the following:
Access the Site via FTP: Use an FTP client like FileZilla to access your website files. Go to the wp-content/plugins directory and rename the folder of the most recently installed or updated plugin. This will deactivate the plugin, and your site may become accessible again.
Check the Error Logs: If you have error logging enabled, check your server logs or the wp-content/debug.log file for any PHP errors that may indicate which plugin is causing the issue.
Restore from Backup: If you have a recent backup of your site, restoring it can be a quick way to fix the problem and get your site back up and running.
E. Using a Staging Site for Testing
To avoid causing issues on your live site, always test new plugins or plugin updates on a staging environment first. Staging sites allow you to replicate your live site in a secure environment, where you can test plugins and configurations without the risk of breaking your actual website.
Many hosting providers offer easy staging environments with just a few clicks. Alternatively, you can use plugins like WP Staging or Duplicator to create a copy of your site for testing purposes.
F. Reinstalling Plugins
If a plugin installation seems corrupted or incomplete, you might need to reinstall it. To do this, simply delete the plugin from the Plugins > Installed Plugins section, and then reinstall it via the Add New screen or upload it manually.
However, be cautious when deleting plugins, especially if the plugin stores important data, such as form submissions or user settings. You might want to back up the plugin’s data before deleting it.
Recommended Plugins for Different Purposes
When managing a WordPress site, the wide variety of plugins available can be overwhelming. Different types of plugins serve various functions, whether it’s improving your website’s performance, enhancing SEO, securing your data, or optimizing your content. Choosing the right plugin for your specific needs is crucial, as it ensures that you get the most value out of your installation while maintaining your site’s speed and security.
A. SEO Plugins
Search Engine Optimization (SEO) is one of the most important factors for increasing visibility and attracting traffic to your site. Luckily, there are several powerful plugins available for WordPress that make SEO management easy, even for beginners.
Yoast SEO: One of the most popular SEO plugins for WordPress, Yoast SEO offers a comprehensive suite of features designed to improve on-page SEO. From keyword optimization to advanced XML sitemaps, Yoast helps ensure that your site meets SEO best practices.
Rank Math: Another highly regarded SEO plugin, Rank Math offers powerful features like built-in schema support, advanced keyword tracking, and integration with Google Search Console. It also offers an intuitive user interface for beginners while still providing advanced features for experienced users.
All in One SEO Pack: This plugin provides a set of basic and advanced SEO tools, including automated metadata generation, sitemap support, and social media integration. It’s perfect for users looking for a streamlined solution that doesn’t overwhelm them with settings.
The SEO Framework: For those who prefer a less intrusive approach to SEO, The SEO Framework offers an automated and clean way to manage SEO. It’s a good choice for users who don’t want to spend too much time tweaking settings.
B. Security Plugins
Website security is essential to ensure that your WordPress site remains safe from hackers, malicious attacks, and data breaches. Security plugins help monitor your website and protect it from various threats.
Wordfence Security: Wordfence is one of the most popular WordPress security plugins. It offers a firewall, malware scanning, and live traffic monitoring. With its extensive logging and alert system, Wordfence keeps your site safe by blocking malicious activity.
Sucuri Security: A comprehensive website security plugin that offers malware scanning, security activity auditing, and protection from DDoS attacks. Sucuri also provides security hardening tips, helping you secure your website and its infrastructure.
iThemes Security: Formerly known as Better WP Security, iThemes Security focuses on providing user-friendly tools to protect your website. It offers brute-force protection, file change detection, and database backups to prevent unauthorized access.
BulletProof Security: BulletProof Security is another great option for securing your WordPress site. It includes features like firewall protection, login security, and database backups, making it a good all-in-one solution for website security.
C. Caching Plugins
Caching is a technique that stores static versions of dynamic content to improve loading times. By using caching plugins, you can reduce server load and speed up page rendering for your visitors.
W3 Total Cache: One of the most widely used caching plugins, W3 Total Cache significantly improves site performance by caching pages, database objects, and even minifying HTML, CSS, and JavaScript.
WP Super Cache: WP Super Cache is another great caching plugin. It generates static HTML files from your dynamic WordPress site, serving these static files to most visitors, which drastically speeds up page load times.
WP Rocket: While WP Rocket is a premium plugin, it’s known for being user-friendly and efficient in boosting website performance. It includes advanced features like lazy loading, database optimization, and content delivery network (CDN) integration, making it a solid option for improving page speed.
D. Backup Plugins
Backing up your WordPress website is a critical task in case anything goes wrong, such as server failure or a malicious attack. Backup plugins allow you to automatically create backups of your site and store them in secure locations.
UpdraftPlus: UpdraftPlus is one of the most popular backup plugins for WordPress. It allows you to schedule backups, store them remotely on services like Google Drive, Dropbox, and Amazon S3, and easily restore your site with just a few clicks.
BackupBuddy: BackupBuddy provides reliable backup solutions with scheduling options, remote storage, and an easy restore process. It also offers migration tools to move your site to a new domain or hosting provider.
VaultPress: VaultPress, powered by Automattic (the company behind WordPress), is a backup solution that offers real-time backup and easy restoration. It is ideal for those who prefer a fully managed backup service.
E. E-commerce Plugins
If you’re running an online store with WordPress, you need a robust e-commerce plugin to handle your sales, product management, and payments. Fortunately, there are excellent plugins to power your online business.
WooCommerce: WooCommerce is the most widely used e-commerce plugin for WordPress, offering an extensive set of features to help you set up and manage an online store. From product variations to tax settings, WooCommerce covers all aspects of running a digital storefront.
Shopify for WordPress: Shopify is another major player in the e-commerce space. Though it’s a standalone platform, you can integrate it with WordPress through a plugin, giving you a robust solution for managing an online store while still enjoying WordPress’s flexibility.
Easy Digital Downloads: If you’re selling digital products like eBooks, music, or software, Easy Digital Downloads is an excellent plugin. It offers easy product management, payment processing, and customer management features.
F. Social Sharing and Integration Plugins
Social media integration is crucial for increasing your content’s reach and engagement. Social sharing plugins enable you to add share buttons to your posts and pages to help visitors share content on platforms like Facebook, Twitter, and Pinterest.
Social Warfare: Social Warfare is a fast, highly customizable social sharing plugin. It offers beautifully designed share buttons, integrates with analytics, and helps optimize your content for maximum social media exposure.
AddToAny: AddToAny is a simple, lightweight plugin that allows users to share content on over 100 social platforms. It’s highly customizable and easy to use, making it a great option for those looking for an all-in-one social sharing solution.
Sassy Social Share: This plugin offers an easy way to add social media sharing buttons to your posts and pages. It supports a wide variety of social platforms and provides customization options for a personalized experience.
How to Select the Right Plugin for Your Needs
When choosing a plugin for your WordPress website, it’s important to make an informed decision that aligns with your site’s goals, functionality requirements, and performance standards. Selecting the wrong plugin can lead to compatibility issues, slow loading times, or even security vulnerabilities.
A. Identify Your Website’s Needs
The first step in selecting the right plugin is to clearly define the needs of your website. Consider the following questions:
What functionality do you need? Are you looking to improve SEO, speed, security, or e-commerce functionality?
How important is performance? Some plugins are lightweight and optimized for speed, while others may be more resource-intensive.
What’s your budget? Many WordPress plugins are free, while others are paid. Choose a plugin that fits within your budget but also offers the necessary features.
B. Read Reviews and Ratings
One of the best ways to assess the quality of a plugin is to check the reviews and ratings left by other users. WordPress’s Plugin Repository allows users to rate plugins, and reading through user reviews can give you insights into the plugin’s functionality, ease of use, and potential issues.
Look for plugins with:
- High ratings (generally above 4 stars)
- Recent updates (indicating that the plugin is actively maintained)
- Positive feedback on features and support
C. Check Compatibility
Before installing a plugin, make sure it is compatible with your version of WordPress. A plugin that hasn’t been updated in a while may not work well with newer versions of WordPress, leading to compatibility issues.
Check the changelog: This can give you insight into how frequently the plugin is updated and whether it’s actively maintained.
Test on a staging site: If you’re unsure about compatibility, always test new plugins on a staging site before deploying them to your live site.
D. Review Plugin Documentation
The quality of plugin documentation is often a reflection of the plugin’s overall quality. Good documentation will guide you through the installation, configuration, and troubleshooting processes, while poor documentation may leave you struggling with setup or customization.
Look for plugins that provide:
- Clear installation instructions
- Step-by-step guides for configuration
- Troubleshooting tips and FAQs
- Active support forums or contact information for developers
E. Evaluate Support Availability
Support is essential, especially if you run into issues with a plugin. A good plugin will offer accessible support through various channels such as email, a support forum, or live chat.
Check if the plugin has:
- Active support forums with quick responses from developers
- A dedicated support page with troubleshooting guides
- A history of resolving common user problems
F. Test for Performance
Always monitor your website’s performance before and after installing a new plugin. Plugins can impact page loading times, especially those that are not well-coded or those that add extra features you don’t need. You can test the speed of your website using tools like Google PageSpeed Insights or GTmetrix before and after installing the plugin to ensure that performance is not significantly impacted.
The Impact of Plugin Performance on SEO
WordPress plugins can significantly influence your website’s performance and, in turn, its SEO ranking. The core aspects of SEO such as loading times, user experience, and technical optimization are often directly impacted by the plugins you use. Although plugins can enhance the functionality of your site, they can also create challenges if not managed properly. Below we will explore the various ways plugin performance affects SEO and how to mitigate potential issues.
A. How Slow Plugins Affect Page Load Speed
Page load speed is one of the most important ranking factors for search engines like Google. Plugins can impact the speed of your website, especially when they add heavy code, large files, or external resources.
Resource-Intensive Plugins: Some plugins, such as those that handle complex features like image galleries, e-commerce, or social sharing, may be resource-heavy. These plugins can load a large amount of JavaScript, CSS, or other assets, leading to slower load times. Since search engines prioritize fast-loading sites, having a slow plugin could push your website lower in the search rankings.
External Requests and Latency: Plugins that rely on external resources, such as content delivery networks (CDNs), third-party analytics, or advertising networks, can introduce delays in page load times. These external requests can cause a higher number of HTTP requests, contributing to latency and increased load time.
How to Mitigate Slow Plugin Impact: Regularly check which plugins are slowing down your site using tools like GTmetrix or Google PageSpeed Insights. You can optimize plugins by enabling caching, compressing images, or minifying CSS and JavaScript files. Using a plugin like WP Rocket or Autoptimize can help reduce the size of files and improve load times.
B. Core Web Vitals and Plugin Optimization
Google’s Core Web Vitals are a set of user-centric metrics that measure the overall user experience. These include metrics like Largest Contentful Paint (LCP), First Input Delay (FID), and Cumulative Layout Shift (CLS), which focus on loading speed, interactivity, and stability.
LCP (Largest Contentful Paint): This metric tracks the time it takes for the largest visible element on the page to load. If plugins are loading heavy media files like large images or videos, they could delay LCP and negatively affect your SEO. It’s critical to ensure that plugins do not block the rendering of important content on the page.
FID (First Input Delay): FID measures the time it takes for a page to become interactive. Plugins that inject a lot of JavaScript can delay interactivity, especially if they perform complex tasks during page load. For example, some plugins for forms, pop-ups, or dynamic content can slow down your site’s responsiveness.
CLS (Cumulative Layout Shift): This metric tracks visual stability and how much content shifts around as a page loads. Plugins that load content dynamically, such as ads or sliders, can cause layout shifts, creating a poor user experience. If your plugins don’t properly reserve space for dynamic elements, this can hurt your CLS score, negatively impacting SEO.
To optimize for Core Web Vitals, you should use plugins that are optimized for performance. Consider plugins like WP Rocket for caching and Perfmatters for disabling unnecessary scripts and preventing render-blocking elements. Additionally, lazy-loading images and videos, a feature available in plugins like Smush or Lazy Load by WP Rocket, can improve your LCP score.
C. Mobile Optimization and Plugin Performance
Google uses a mobile-first indexing approach, meaning that it prioritizes the mobile version of your website for ranking. As mobile users continue to increase, ensuring that your site is fully optimized for mobile is essential for both user experience and SEO.
Plugins can have a direct impact on mobile optimization. Some plugins are not responsive, meaning they don’t adjust well to different screen sizes. This can create a poor mobile experience, which negatively impacts your SEO.
Unoptimized Plugins: Some plugins add complex desktop features that may not render properly on mobile devices. For instance, plugins for large sliders, interactive elements, or pop-ups may look cluttered or broken on smaller screens, resulting in a frustrating mobile experience.
How to Ensure Mobile Optimization: Test plugins on various mobile devices to ensure they are responsive and that no elements break. You can use responsive design testing tools or browser developer tools to check for issues. Additionally, focus on plugins that support mobile optimization, such as mobile-friendly sliders or responsive image galleries. Plugins like Elementor and Beaver Builder are designed to work well on both desktop and mobile, ensuring that your site looks great on all devices.
D. Plugin Overload and SEO Performance
The more plugins you use, the more complex your WordPress site becomes. Each plugin adds additional code, resources, and potential points of failure, which can negatively affect your site’s overall performance.
Too Many Plugins: When you install too many plugins, you increase the chances of conflicts between plugins, which can slow down your site and lead to errors. The more plugins you add, the harder it becomes to maintain performance and security, both of which are critical for SEO.
Plugin Bloat: Some plugins come with features you may never use, which means you’re adding unnecessary bloat to your site. For instance, some SEO plugins have additional features that you may not need, or some social sharing plugins offer features like sharing counters that you don’t use, unnecessarily loading more scripts.
How to Manage Plugin Overload: Regularly audit the plugins you have installed and disable or delete the ones you don’t use. Keep your plugin list lean and efficient, and try to choose multipurpose plugins that cover several features at once. For instance, instead of using separate plugins for SEO, performance, and social sharing, consider using an all-in-one solution like Yoast SEO or Rank Math that can handle multiple tasks at once.
E. The Right Plugins for SEO Optimization
Some plugins are specifically designed to help improve your SEO performance. These plugins automate various SEO tasks, making it easier to optimize your website for search engines. Below are some examples of essential SEO plugins:
Yoast SEO: Yoast is one of the most popular SEO plugins available for WordPress. It helps with on-page SEO by offering suggestions for optimizing your content, titles, and metadata. Yoast also generates XML sitemaps, improves social media integration, and provides tools for managing breadcrumbs.
Rank Math: Rank Math is another excellent SEO plugin that offers a more feature-packed, user-friendly interface. It includes schema markup support, keyword tracking, advanced sitemaps, and integration with Google Search Console, all of which contribute to better SEO performance.
All in One SEO Pack: This plugin is a great alternative to Yoast, offering many of the same features with a slightly different approach. It helps with on-page optimization, integrates with social media, and provides tools for advanced SEO management.
By using the right SEO plugins and optimizing your site’s technical performance, you can improve your SEO ranking while maintaining good website speed and user experience.
Alternatives to WordPress Plugins
While plugins are the go-to solution for enhancing the functionality of your WordPress site, there are certain situations where plugins might not be the best choice. In these cases, alternatives such as custom code, external services, and theme-specific features can provide a more streamlined solution for adding functionality to your site.
A. Custom Code Solutions
Custom code can often be a better solution than relying on plugins, especially when it comes to performance optimization. Writing custom code gives you complete control over your website’s functionality and performance.
Tailored Features: Instead of relying on a plugin to provide a feature like custom post types, taxonomies, or shortcodes, you can write your own PHP code to create exactly what you need. Custom code allows you to build only the necessary features for your website, avoiding bloat that might come with using a plugin designed for a broader audience.
Performance Optimization: Custom code typically runs faster than a plugin because it only includes the specific functionality required for your website. Additionally, there’s no need for external resources or heavy dependencies, which can slow down your website.
When to Use Custom Code: Custom code is most effective for small, specialized tasks that don’t require a wide range of features. For instance, if you need a custom form or a simple integration with an external service, writing your own code can be faster and more efficient than using a plugin.
B. External Services and APIs
External services and APIs can often replace the need for plugins, providing more robust and scalable solutions. Many third-party services offer integration options that allow you to add functionality to your site without relying on plugins.
CRM Integration: Instead of using a plugin like WPForms or Gravity Forms to manage form submissions, you can integrate a third-party CRM like Mailchimp, HubSpot, or Salesforce. These services often provide built-in forms, email automation, and analytics, removing the need for an additional plugin.
Payment Gateways: For e-commerce sites, using an external payment gateway like Stripe or PayPal can be more efficient than relying on a plugin like WooCommerce. Many payment processors offer direct integration with WordPress and can handle transactions seamlessly.
Content Delivery Networks (CDNs): Rather than using caching plugins to optimize performance, you can use an external CDN like Cloudflare or Amazon CloudFront. CDNs cache static content and deliver it from servers around the world, significantly reducing load times and improving SEO.
C. WordPress Themes with Built-In Features
Many premium WordPress themes come with built-in features that eliminate the need for additional plugins. These themes are often optimized for performance and offer a wide range of customization options without the need to install third-party plugins.
Page Builders: Themes like Astra and OceanWP include built-in page builders that let you create custom layouts without using plugins like Elementor or WPBakery. These themes provide flexible design options that allow you to build complex pages with minimal coding.
SEO Tools: Some themes come with built-in SEO features, eliminating the need for a plugin like Yoast SEO. These themes often include options for managing meta tags, generating sitemaps, and integrating with Google Analytics.
Speed Optimization: Many modern WordPress themes are designed to be lightweight and fast, reducing the need for performance plugins. These themes are built with optimized code and minimal bloat, improving your site’s loading times and overall performance.
Plugin Documentation and Support
Having access to solid documentation and reliable support is crucial when using WordPress plugins. Well-documented plugins make it easier to install, configure, and troubleshoot any issues, while responsive support teams can help resolve technical problems quickly. Below, we’ll explore the importance of plugin documentation and support and how they contribute to your overall plugin experience.
A. Importance of Comprehensive Documentation
Good documentation is a vital part of any plugin. It helps users understand how to install, configure, and optimize the plugin, as well as troubleshoot common issues. Comprehensive documentation includes:
Installation Guides: Clear, step-by-step instructions on how to install the plugin and configure it correctly. This is particularly important for complex plugins with multiple settings.
Feature Walkthroughs: Documentation should include detailed explanations of the plugin’s features, what each setting does, and how to use the plugin effectively.
Troubleshooting Information: Good documentation should also address common issues users may face and offer solutions. This can save you a lot of time when troubleshooting problems, especially if they involve conflicts with other plugins or themes.
B. Access to Support and Community Forums
Even the best plugins sometimes experience issues or need adjustments. Having access to quality support is essential for quickly resolving problems. Look for plugins that offer:
Active Support Channels: Many premium plugins offer dedicated support teams that can be contacted via email or a ticketing system. Free plugins may have less direct support, but they often offer community-based forums where users can share advice and solutions.
User Communities: Some plugins have large user communities, such as forums or Slack channels, where users can discuss problems and share solutions. These communities can be a great resource for troubleshooting issues and learning new ways to use the plugin.
Dedicated Developer Support: For premium plugins, the development team may offer direct support through personalized troubleshooting, ensuring that any problems are resolved quickly and efficiently.
C. Checking Plugin Reviews and Ratings
Before installing a plugin, it’s a good idea to check reviews and ratings. User feedback can help you gauge the quality of a plugin’s documentation and the responsiveness of its support team.
Look for plugins with:
High Ratings: Plugins with a high average rating are typically well-documented and offer good support.
Recent Reviews: Ensure that reviews are up to date and reflect the latest version of the plugin. Avoid plugins with many outdated reviews that may not be relevant anymore.
How to Remove Plugins Safely
Removing plugins from your WordPress website is a common task, but it needs to be done carefully to ensure that it doesn’t cause any unintended issues. If done improperly, plugin removal can break your site, remove crucial functionality, or even cause conflicts with other plugins. Here’s a guide on how to safely remove plugins from WordPress while avoiding problems.
A. Deactivating Plugins Before Removal
The first step in safely removing a plugin is deactivating it. This allows you to test the plugin’s removal without the risk of site crashes or malfunctioning features. Here’s how you can deactivate a plugin:
- Navigate to the Plugins Section: From your WordPress dashboard, go to “Plugins” and click “Installed Plugins.”
- Find the Plugin: Scroll down to locate the plugin you wish to deactivate.
- Deactivate: Click the “Deactivate” link beneath the plugin name.
Deactivating the plugin stops its functionality but doesn’t delete any files or data associated with it, allowing you to revert the change if necessary.
B. Check for Dependencies and Plugin Conflicts
Before proceeding with the removal, it’s essential to check whether other plugins or themes rely on the plugin you’re about to remove. Removing a plugin that other features depend on can cause problems. Here’s how to check:
- Look for Plugin Dependencies: If the plugin you’re removing provides critical functionality, such as security or SEO features, ensure that no other plugin is relying on its services.
- Test the Site: After deactivation, check the front-end and back-end of your site for any broken features or error messages.
- Use a Staging Site: If possible, perform the plugin removal on a staging site first, so you can see the impact without affecting your live site.
C. Delete Plugin Files
Once the plugin is deactivated and you’ve ensured no conflicts will arise, you can safely delete the plugin:
- Delete Plugin from the Dashboard: After deactivating the plugin, you’ll see an option to “Delete” it. Clicking this removes the plugin’s files from your site.
- Manually Delete Leftover Files (if necessary): Some plugins may leave files behind after deletion. These can include settings files, cache files, or database entries. Use an FTP client or file manager in your hosting control panel to search for and delete any remaining plugin files.
Be cautious when deleting plugin files manually, as removing the wrong files can potentially harm your WordPress installation.
D. Clean Up Database Entries
Some plugins store data in the WordPress database even after they are deleted. This can cause database bloat, slowing down your site. To clean up the database:
- Use a Plugin Cleaner: Plugins like WP-Optimize or Advanced Database Cleaner can help you remove orphaned database tables that are left behind after a plugin is uninstalled.
- Manually Clean the Database: If you’re comfortable working with MySQL, you can manually check for any leftover database tables or options related to the deleted plugin.
E. Testing After Removal
After the plugin has been removed, thoroughly test your website. Check all front-end and back-end pages, especially the areas the plugin was supposed to impact. This will ensure there are no hidden issues or conflicts caused by the plugin’s removal.
F. Backup Your Site Before and After
It’s always recommended to back up your website before and after removing a plugin. This ensures you can quickly restore your site if anything goes wrong. Backup plugins like UpdraftPlus or BackupBuddy make the process easy.
G. Monitoring Post-Removal
After plugin removal, monitor your site’s performance and user experience. Pay attention to load times, error logs, and user feedback. If you notice anything unusual, you may need to revisit the removal process or check for any lingering issues.
Best Practices for Plugin Maintenance
Maintaining your WordPress plugins is crucial for ensuring they continue to function optimally, stay secure, and don’t interfere with your site’s performance. Here are the best practices you should follow to maintain your plugins effectively.
A. Regularly Update Plugins
Outdated plugins are one of the most significant security risks for WordPress sites. Regularly updating plugins helps ensure that you are protected from known vulnerabilities. Here’s how to stay on top of plugin updates:
Enable Automatic Updates: WordPress allows you to enable automatic updates for plugins. This ensures that you receive the latest security patches and feature improvements as soon as they’re released.
Check for Updates Manually: You can also manually check for plugin updates in the “Plugins” section of your dashboard. If you have multiple plugins, consider setting a schedule (e.g., once a week) to review and update your plugins.
Stay Informed: Follow plugin developers on social media or check their support forums for news about updates, vulnerabilities, or new features.
B. Test Plugins Before Updating on a Staging Site
Updating plugins on your live website can sometimes cause conflicts with other plugins or themes, resulting in errors or broken functionality. To avoid issues:
Use a Staging Site: Set up a staging environment where you can test plugin updates before applying them to your live site. Many hosts offer easy ways to create staging sites with just a few clicks.
Check Plugin Compatibility: Before updating, check the plugin’s changelog and support forums to ensure there are no known issues with the new version.
C. Remove Unused or Inactive Plugins
Keeping inactive plugins on your WordPress site is risky. Even though they are not activated, these plugins can still contain security vulnerabilities or clutter up your dashboard. Follow these steps to keep your plugin list clean:
Review Installed Plugins: Periodically go through your list of installed plugins and remove any that are not in use.
Consider Deactivating Plugins Before Deleting: If you are unsure about deleting a plugin, deactivate it first and monitor your site. If no issues arise, go ahead and delete it.
D. Regularly Backup Your Site
Before making any changes to your plugins—whether it’s updating, installing, or removing them—always back up your site. This ensures you can restore your site if anything goes wrong during the update process.
Use Automated Backup Solutions: Plugins like UpdraftPlus or VaultPress can schedule regular backups of your site. This way, you don’t have to worry about forgetting to back up before making changes.
Test Your Backups: Occasionally test your backups to ensure they can be restored successfully if necessary.
E. Monitor Plugin Performance
Over time, plugins may start to affect your website’s performance, especially as you add more features. Regularly monitor your site’s speed and performance to ensure that your plugins are not causing slowdowns.
Use Performance Monitoring Tools: Tools like GTmetrix, Pingdom, or Google PageSpeed Insights can help you identify performance issues related to plugins.
Test After Installing New Plugins: After installing or updating a plugin, always test your site’s speed to ensure there are no negative impacts.
F. Read Plugin Reviews and Changelogs
Before installing any new plugin or updating an existing one, read the reviews and changelogs. This helps you avoid plugins with known issues and ensures that the updates address security concerns or introduce useful features.
Read Changelogs: Changelogs show what’s been fixed or added in each new plugin update. Always check for any breaking changes that could affect your site.
Review Ratings and Feedback: User feedback can provide insight into whether a plugin works as expected and if it’s maintained regularly.
G. Keep Plugin Customizations Organized
If you’ve customized a plugin’s functionality, make sure those changes are well-documented. This will make it easier to update the plugin in the future without losing your customizations.
Use Child Themes: If you’re modifying plugin templates, use a child theme to avoid losing your changes when the plugin is updated.
Track Customizations in Version Control: If possible, track your custom code changes in a version control system like Git.
Advanced Plugin Management Techniques
As your website grows, managing plugins can become more challenging. To maintain a well-organized and high-performing WordPress site, consider implementing these advanced plugin management techniques.
A. Use Plugin Management Tools
Plugin management tools can help streamline the process of updating, deactivating, and testing plugins across multiple sites.
ManageWP: ManageWP is a tool that allows you to manage all your WordPress sites from a single dashboard. You can update plugins, themes, and WordPress core across multiple sites simultaneously.
InfiniteWP: Similar to ManageWP, InfiniteWP allows you to manage plugins and backups across all your WordPress installations from one location.
MainWP: MainWP offers centralized management for WordPress sites, making it easier to update and monitor plugins across multiple websites.
B. Leverage Plugin Groups and Categories
If you manage multiple plugins, it can be helpful to organize them into categories based on their functionality. This will help you quickly identify and manage plugins in the future.
Create Plugin Categories: Some plugin management tools allow you to categorize your plugins by type (e.g., SEO, Security, Performance).
Group Related Plugins: For example, if you have multiple caching plugins or security plugins, group them together to monitor their performance and ensure no conflicts arise.
C. Automate Plugin Testing
Automating plugin testing can save you a lot of time, especially when you are running a site with many plugins. Use tools like WP Engine’s Smart Plugin Manager to automatically test updates on your staging site before applying them to your live website.
D. Version Control for Custom Plugins
If you’ve developed custom plugins or made significant modifications to existing ones, it’s a good practice to use version control. Version control systems like Git allow you to track changes, collaborate with other developers, and roll back changes if necessary.
WordPress Plugin Trends to Watch
WordPress plugins are constantly evolving, and staying updated on the latest trends can help you make better decisions when selecting and managing plugins for your site.
A. Integration with AI and Machine Learning
AI-powered plugins are becoming more popular, particularly in areas like content generation, personalization, and SEO. Plugins like WordLift use AI to enhance SEO by automating content tagging, while others like ChatGPT for WordPress offer conversational agents to improve customer service.
B. Plugin Compatibility with Headless WordPress
Headless WordPress is gaining traction, and plugins designed for headless CMS are becoming more popular. These plugins decouple the front-end and back-end of your site, allowing you to use WordPress as a content repository while serving content via an API to various front-end applications.
C. Performance-Optimizing Plugins
As website speed becomes an increasingly important ranking factor, plugins focused on performance optimization are on the rise. Caching, image compression, and lazy loading plugins will continue to evolve, helping users speed up their WordPress sites.
Case Studies: Successful Plugin Implementations
Analyzing case studies of WordPress plugin implementations can offer invaluable insights into how plugins are used in real-world scenarios. The success of these plugins often lies in their ability to solve specific challenges faced by website owners and developers. Let’s dive into a few case studies from different sectors to see how plugins are used effectively.
A. Example 1: E-Commerce Site Optimization with WooCommerce Plugins
An online store, TechGizmos, a small e-commerce business selling tech gadgets, was struggling with managing its store operations efficiently while maintaining good SEO rankings and a smooth user experience. They had a few core challenges:
Manual Inventory Updates: Managing inventory and updating product listings took up a significant amount of time.
SEO Optimization: Despite having a decent product catalog, the site’s SEO wasn’t optimized for better search rankings.
Payment Integration: While they were using standard PayPal integration, they didn’t offer other payment methods like credit cards and bank transfers.
To address these issues, they opted to implement a combination of powerful WooCommerce plugins. Here’s how they transformed their operations:
WooCommerce Subscriptions: This plugin allowed TechGizmos to create and manage subscription-based products, offering their customers automatic recurring payments. With subscriptions in place, they could predict revenue and streamline billing operations.
WooCommerce SEO by Yoast: TechGizmos integrated Yoast SEO, which helped optimize product pages for better search engine visibility. Yoast SEO automatically generated sitemaps, optimized product metadata, and made it easy to configure structured data, boosting organic traffic.
WooCommerce Stripe Payment Gateway: To expand payment options, TechGizmos installed the WooCommerce Stripe Payment Gateway. This plugin provided a seamless credit card payment system, allowing customers to check out securely without leaving the site. It supported international payments and recurring billing for subscriptions.
WooCommerce Product Add-Ons: This plugin allowed TechGizmos to offer product customization options, such as gift wrapping or extended warranties, which increased average order value. Customers could choose add-ons during checkout, improving the user experience.
Results:
After implementing these plugins, TechGizmos experienced a 35% increase in sales, primarily driven by improved SEO and the addition of subscription products.
Their payment processing became more efficient with the ability to accept credit cards and recurring payments.
Inventory management became automated with updates synced in real-time, significantly reducing manual errors and time spent on product listings.
This case study demonstrates how a combination of specialized plugins can address multiple aspects of e-commerce and lead to measurable business growth.
B. Example 2: Content Creation Site with AI-Driven Plugins
Inspire Media, a content-heavy site focusing on tech news and reviews, faced difficulties with managing its large content database, automating SEO tasks, and generating optimized headlines for articles. Their primary challenges were:
Manual Content Optimization: Writers were struggling to implement SEO best practices consistently, such as optimizing meta descriptions, headings, and keyword density.
Lack of Personalization: Inspire Media wanted to personalize content recommendations for their readers to increase engagement but lacked the tools to do so.
To address these challenges, Inspire Media integrated several AI-driven plugins that not only solved their SEO issues but also enhanced their user engagement and content strategy. Here’s how they implemented the changes:
WordLift: WordLift is an AI-powered SEO plugin that helped Inspire Media automate the SEO optimization of articles. It analyzes the content and automatically suggests keywords, meta descriptions, internal links, and even related articles. Additionally, it used AI to build a knowledge graph, enhancing the site’s overall SEO by creating a structured database of related content.
Yoast SEO Premium: Inspire Media upgraded to Yoast SEO Premium, which offered additional tools like internal linking suggestions and automated redirection creation. This helped the editorial team save time on SEO tasks, allowing them to focus more on creating quality content.
One Click AI Headlines: This plugin used AI to generate optimized headlines based on data-driven insights. Inspire Media writers could input their article’s theme, and the plugin suggested catchy, high-performing titles, improving click-through rates.
Content Personalization with Personalizer: To improve user engagement, Inspire Media installed Personalizer, a plugin that used AI to deliver personalized content recommendations based on user behavior. The plugin analyzed visitor interactions and suggested related articles, boosting session duration and page views.
Results:
SEO performance improved dramatically as WordLift and Yoast SEO Premium automated many SEO tasks, resulting in a 45% increase in organic traffic.
The AI-generated headlines helped increase CTR by 25%, as visitors were more likely to click on compelling, optimized titles.
User engagement improved by 30% due to the content recommendations powered by Personalizer, making readers stay longer on the site and explore more content.
This case study highlights how AI-driven plugins can save time, automate complex tasks, and drive engagement, making them a powerful asset for content-centric websites.
C. Example 3: Nonprofit Organization Website with Donation Plugins
A nonprofit organization focused on environmental conservation, GreenEarth, needed a way to streamline online donations, increase transparency, and provide easy access to information for donors. They had a small team and struggled with outdated donation systems, poor integration with payment gateways, and a lack of detailed reporting.
To address these issues, GreenEarth decided to implement a set of powerful donation plugins. Here’s how they made improvements:
GiveWP: GiveWP is a donation plugin designed specifically for nonprofits. It allowed GreenEarth to easily set up online donation forms with customizable options for different donation amounts, recurring donations, and custom donation goals. The plugin also integrated seamlessly with PayPal and Stripe, allowing donors to give securely.
Donorbox: To enhance their donation system, GreenEarth implemented Donorbox, which provides an advanced donation form that allows for recurring donations, employer-matched donations, and detailed tracking of donor activity. This gave GreenEarth a more robust, professional fundraising platform.
Charitable: For advanced reporting and detailed donation analytics, GreenEarth used Charitable, which provided real-time donor tracking and reporting, helping them better manage fundraising campaigns and target the right audience.
WooCommerce for Fundraising: For specific fundraising events, GreenEarth implemented WooCommerce as a platform for selling tickets or items for special events, where a portion of the proceeds went toward their cause. This helped them reach a broader audience and increase donations during fundraising events.
Results:
Donation numbers surged by 60%, primarily due to the ease of donating through GiveWP and Donorbox. The recurring donation system encouraged repeat support from loyal donors.
The advanced reporting tools provided by Charitable helped the team track donations and identify trends, allowing them to target their marketing efforts more effectively.
Fundraising events saw a 50% increase in ticket sales and donations, thanks to the WooCommerce integration.
GreenEarth’s success demonstrates how nonprofit organizations can leverage WordPress plugins to streamline donations, engage supporters, and track fundraising efforts more effectively.
D. Example 4: Educational Platform with Membership Plugins
LearnPlus, an online education platform, was seeking to build a robust membership system that allowed them to offer premium courses, manage subscribers, and track student progress. Their challenges were:
Subscription Management: They needed a way to manage paid memberships and restrict access to premium content.
Student Engagement: They wanted to provide students with progress tracking and a way to interact with instructors and peers.
By implementing a set of targeted plugins, LearnPlus was able to meet these challenges and more:
MemberPress: MemberPress is a comprehensive membership plugin that enabled LearnPlus to create different membership tiers, restrict content based on subscriptions, and manage member access. This allowed them to create a paywall for premium courses and protect high-value content.
LearnDash: For course management, LearnDash provided LearnPlus with a powerful learning management system (LMS). It allowed them to create and sell online courses, track student progress, and issue certificates upon completion.
BuddyPress: To foster a sense of community among students, LearnPlus implemented BuddyPress, which allowed students to interact with each other through forums, direct messaging, and groups. This made the learning experience more interactive and collaborative.
WooCommerce Subscriptions: To offer subscription-based access to premium courses, LearnPlus used WooCommerce Subscriptions to manage recurring payments for memberships. This integration helped automate billing and renewals.
Results:
LearnPlus saw a 40% increase in subscription-based memberships, thanks to the flexibility and ease of use provided by MemberPress and WooCommerce Subscriptions.
Student engagement improved by 30% as a result of BuddyPress, which encouraged students to interact with their peers and instructors.
LearnPlus’s courses became more structured, and tracking student progress through LearnDash increased course completion rates by 20%.
This case study illustrates how educational websites can use plugins to build dynamic membership systems, manage subscriptions, and enhance student engagement.
Conclusion
WordPress plugins have become the backbone of modern website management, allowing website owners and developers to extend the functionality of their WordPress sites without needing to write complex code. The ability to install, configure, and maintain plugins effectively is one of the essential skills for any WordPress user. In this comprehensive guide, we’ve explored the various aspects of working with WordPress plugins, from installation and activation to troubleshooting and best practices. The goal has been to provide you with the tools and insights necessary to maximize the benefits of plugins while ensuring your website remains secure, fast, and optimized.
Understanding WordPress Plugins: A Powerful Tool for Customization
At the core of any successful WordPress site is the flexibility provided by plugins. These small software packages allow you to add features and functionality that would otherwise require complex coding. From SEO optimization to e-commerce integration, plugins allow you to tailor your website to your specific needs, making them indispensable for both beginners and seasoned developers alike.
Through the outline, we’ve established that plugins serve a wide range of purposes, from enhancing performance and improving security to creating entirely new website features. Understanding the power of plugins and how to select the right ones for your website can drastically improve your website’s performance and user experience.
Pre-Installation Considerations: Setting Up for Success
Before diving into plugin installation, understanding the prerequisites is crucial. The pre-installation considerations we discussed—including selecting reliable plugins, checking for compatibility with your WordPress version and themes, and performing backups—are essential for ensuring smooth plugin implementation. As we noted, taking the time to research plugins, read reviews, and ensure compatibility with your theme and other plugins helps prevent potential conflicts that could lead to performance issues or even crashes. Also, always remember to back up your site before making any changes to your plugin configuration.
Installing plugins isn’t just about adding new functionality; it’s about doing so with careful planning to avoid disrupting your site’s current setup. By considering compatibility and the stability of your website before installation, you’ll be more likely to enjoy a hassle-free experience.
How to Install, Activate, and Deactivate Plugins: A Step-by-Step Guide
The core processes of installing and activating plugins are straightforward, but they come with a series of important steps that can have long-term effects on your website’s performance. As we’ve outlined, installing a plugin via the WordPress dashboard is simple, but understanding the steps that follow—activating plugins correctly and testing them on your staging environment—ensures that you don’t run into conflicts or break any existing features.
Deactivating and deleting plugins when no longer needed is just as important as installation. A clean plugin environment means fewer security vulnerabilities, faster performance, and more room to test out new ideas. As discussed, it’s essential to deactivate plugins first to see how your site reacts before deciding to remove them entirely.
Configuring Plugin Settings for Optimal Results
Once a plugin is installed and activated, the next critical step is configuration. Plugins often come with a variety of settings that allow you to fine-tune how they interact with your website. As we mentioned in the post, taking time to explore the settings of each plugin is key to ensuring that they perform as expected. In some cases, the default settings may not be ideal for your specific use case, and customizations can make a significant difference in performance.
For instance, with SEO plugins like Yoast SEO or RankMath, configuring the right options for your content type, keyword strategy, and metadata can lead to significant improvements in search engine rankings. Similarly, with e-commerce plugins like WooCommerce, configuring shipping, payment methods, and tax rules can be the difference between a smooth checkout experience and abandoned carts.
Maintaining Plugin Performance and Security
Managing your plugins effectively goes beyond installation and initial configuration. Regular maintenance, including updating plugins, backing up your site, and testing for compatibility, is vital for keeping your website secure and performing at its best. As we discussed, keeping plugins up-to-date is essential for ensuring that any security patches or performance improvements are applied to your site. Neglecting updates can leave your site vulnerable to cyber-attacks or performance slowdowns.
It’s equally important to track your plugin’s performance using performance monitoring tools, as we highlighted. Plugins that slow down your site can affect user experience and your SEO rankings. Tools like GTmetrix or Pingdom can help identify which plugins may be affecting your site’s load time.
By following a consistent plugin maintenance schedule, you can prevent issues before they arise and keep your website running smoothly.
Security Best Practices and Troubleshooting
One of the most crucial aspects of plugin management is ensuring the security of your WordPress website. As we covered in the blog, plugins are potential entry points for cyberattacks, so choosing reputable, regularly updated plugins from trusted sources is paramount. Regularly checking your site for plugin-related vulnerabilities and resolving issues promptly is an essential part of maintaining a secure website.
Additionally, troubleshooting plugin issues is an inevitable part of managing a WordPress site. Whether a plugin causes conflicts with others or creates compatibility problems after an update, knowing how to resolve these issues is key. We’ve provided troubleshooting steps that include disabling all plugins, checking for theme conflicts, and examining error logs—strategies that can help isolate and fix problems efficiently.
Plugin Trends and Best Practices for the Future
WordPress plugin development is constantly evolving. Trends like AI-powered plugins, cloud integrations, and performance optimization are reshaping the way websites are built and maintained. By staying informed about these developments, you can ensure that your website remains competitive and up to date. As we highlighted in the blog, keeping an eye on emerging trends in plugin development will allow you to take advantage of new technologies that improve user experience, increase efficiency, and enhance functionality.
For example, AI-driven plugins are becoming more sophisticated, with tools that automate content optimization, user engagement, and even customer service (via chatbots). Additionally, cloud-based plugins are offering increased scalability, security, and speed, making them ideal for larger websites and those with high traffic volumes. These trends are not just changing the way websites function—they’re helping website owners stay ahead in an increasingly competitive digital world.
Summary: A WordPress Site Powered by Plugins
In summary, WordPress plugins are an essential part of building, managing, and scaling websites in today’s digital landscape. From the installation process to ongoing maintenance, the insights provided in this blog post equip you with the knowledge you need to install, configure, and manage plugins effectively.
By following the steps outlined—selecting reliable plugins, configuring them correctly, keeping them updated, and addressing security and performance issues—you can unlock the full potential of WordPress plugins and ensure your website remains fast, secure, and user-friendly. Whether you’re running a small blog, an e-commerce store, a nonprofit, or a large educational platform, plugins give you the flexibility to customize and enhance your website in ways that would otherwise be time-consuming and expensive.
So, as you move forward, take the time to experiment with different plugins that fit your website’s unique needs. Don’t hesitate to explore new trends, troubleshoot effectively, and implement best practices. With careful plugin management, you can create a WordPress website that not only meets your goals but exceeds your expectations.
In the fast-paced world of website development, mastering WordPress plugins will continue to be an essential skill for anyone looking to create a successful and dynamic online presence.
FAQs
FAQ 1: What Are the Most Common Mistakes to Avoid When Installing WordPress Plugins?
When installing WordPress plugins, beginners often make mistakes that can lead to performance issues, security vulnerabilities, or even complete site failures. Here are some common mistakes to avoid to ensure a smooth plugin installation process.
1. Ignoring Compatibility Checks
One of the biggest mistakes is ignoring compatibility. WordPress plugins are regularly updated, but so is WordPress itself. Before installing a plugin, ensure that it is compatible with your current version of WordPress and other active plugins. Incompatibility can result in site crashes or conflicts between plugins that cause them to malfunction. Always check the plugin’s changelog, user reviews, and the WordPress plugin repository to confirm compatibility.
2. Not Testing Plugins on a Staging Site First
Another common mistake is installing a plugin directly on a live site without testing it on a staging or test site first. This can have disastrous consequences, especially when the plugin affects site layout, content, or functions unexpectedly. By testing the plugin on a staging site, you can identify any conflicts or performance issues without putting your live site at risk.
3. Installing Too Many Plugins
While WordPress plugins are incredibly useful, adding too many can cause your site to slow down or become bloated. Not all plugins are built equally, and some consume excessive resources or introduce unnecessary code into your site. Be selective about which plugins you install, and only keep those that are absolutely necessary for the functionality you need.
4. Failing to Keep Plugins Updated
One of the most important aspects of plugin management is keeping plugins up to date. Many WordPress users forget or delay updating their plugins, leaving their sites vulnerable to security breaches and performance problems. Plugins often receive updates that include critical security patches, bug fixes, and performance improvements, so make sure to install updates regularly.
5. Installing Plugins from Untrustworthy Sources
Finally, it’s essential to avoid installing plugins from untrustworthy sources. Only download plugins from reputable sites like the official WordPress Plugin Directory, as third-party plugins from unreliable sources can introduce malware or poorly written code that harms your site. Stick to well-reviewed, regularly updated plugins to ensure your site remains secure.
By avoiding these mistakes, you can ensure that the installation of plugins adds value and functionality to your WordPress site, rather than causing problems that could affect your site’s performance or security.
FAQ 2: How Do I Know Which Plugins Are Affecting My Website’s Performance?
Website speed is crucial for user experience and SEO rankings. Plugins, while incredibly helpful, can also slow down your site if they are not optimized properly. Here’s how you can identify which plugins are affecting your site’s performance and what you can do about it.
1. Use Performance Testing Tools
One of the easiest ways to identify performance bottlenecks caused by plugins is by using website performance testing tools such as GTmetrix, Pingdom, or Google PageSpeed Insights. These tools analyze your site’s speed and give you a detailed breakdown of where delays are occurring. They’ll often point out which scripts, stylesheets, or plugins are taking longer than expected to load. By analyzing the performance reports, you can quickly pinpoint plugins that may be contributing to slower load times.
2. Conduct a Plugin Performance Audit
A more hands-on approach involves conducting a manual plugin audit. Disable all your plugins and measure your website’s performance. Then, reactivate your plugins one by one and check the site’s speed after each activation. This will help you identify which plugins are causing slowdowns. You can also monitor your site’s server load during this process to check if any particular plugin consumes excessive resources.
3. Review Plugin Code and Features
Not all plugins are created equally. Some plugins come with bloated code or are poorly optimized, which can significantly affect your site’s performance. Review the plugin’s documentation or code if you have the expertise. Plugins that include unnecessary features or have not been updated recently might not be optimized for performance, causing additional load time. Opt for lightweight alternatives whenever possible.
4. Consider Caching Plugins and Content Delivery Networks (CDNs)
If you’re struggling with performance issues due to plugins, consider implementing a caching plugin like W3 Total Cache or WP Super Cache, which can help reduce server load and speed up the delivery of content to your users. Additionally, integrating a CDN like Cloudflare can offload the delivery of static resources, such as images and scripts, to different servers, improving site load times.
5. Replace or Remove Problematic Plugins
If you find that a specific plugin is slowing down your website and no amount of optimization or configuration changes will solve the issue, it might be time to replace it or remove it entirely. Look for more efficient alternatives that offer similar features but with better performance optimization.
6. Regular Performance Monitoring
Finally, keep an eye on your site’s performance regularly, especially after installing or updating plugins. Plugins can introduce changes over time, so it’s crucial to monitor your website for any performance shifts.
By identifying and addressing the plugins that negatively affect your site’s performance, you can improve load times, enhance user experience, and even boost your SEO rankings.
FAQ 3: How Can I Safely Remove a WordPress Plugin Without Breaking My Site?
Removing plugins from your WordPress site might seem straightforward, but there’s a right way to do it to avoid breaking your site. Plugins are often deeply integrated with your website’s functions, and improper removal could leave residual code, database entries, or settings that cause issues down the line.
1. Deactivate the Plugin First
The first step in safely removing a plugin is to deactivate it. Simply go to the Plugins section in your WordPress dashboard, locate the plugin, and click Deactivate. This will stop the plugin from running but will not remove it from your site. Deactivation is important because it allows you to test if your site is functioning properly without the plugin. Check your site thoroughly to see if there are any immediate issues before you proceed with removal.
2. Test for Plugin Conflicts
After deactivating the plugin, perform a quick check on your website. Test key functionalities, such as forms, checkout processes (for e-commerce sites), or any features that were reliant on the plugin. This step ensures that deactivating the plugin didn’t cause any negative side effects. If you notice issues, investigate whether the problem is related to the plugin and consider troubleshooting or finding an alternative.
3. Use a Backup
Before removing a plugin completely, always back up your website. Backups are crucial, as they allow you to restore your site to its previous state if anything goes wrong. If you don’t have a backup, consider using a WordPress backup plugin like UpdraftPlus to create one. With a backup, you can feel more confident in removing the plugin without worrying about unintended consequences.
4. Remove the Plugin’s Data and Settings
Some plugins leave behind database entries, files, or configuration settings after they are deactivated. If you don’t want this residual data to affect your site, you can use plugins like WP-Sweep or Advanced Database Cleaner to remove leftover data. These plugins help you clean up unnecessary data from your database, ensuring that your site remains tidy and optimized after plugin removal.
5. Delete the Plugin
Once you’ve tested and backed up your site, and removed any leftover data, it’s time to delete the plugin. Go back to your WordPress dashboard, click on Delete under the deactivated plugin. WordPress will prompt you to confirm the deletion, and the plugin will be completely removed from your site.
6. Check for Site Integrity
Finally, after the plugin has been removed, it’s important to check the overall integrity of your site. Test its functionality again, ensuring that everything is working as expected. Check for any broken links, missing media, or unexpected issues. If you notice any problems, restore your backup and reconsider your approach to removing the plugin.
By following these steps, you can safely remove plugins from your WordPress site without causing any disruptions.
FAQ 4: Can I Use Multiple Plugins for the Same Functionality?
Many WordPress users wonder whether they can install multiple plugins that serve similar purposes or overlap in features. The short answer is yes, but there are a few important things to consider.
1. Risk of Conflicts
The most significant risk of using multiple plugins for the same functionality is the potential for plugin conflicts. When two plugins try to handle the same task—whether it’s SEO optimization, caching, or security—they may interfere with each other, causing glitches, errors, or unexpected behavior on your website. For instance, using two SEO plugins like Yoast SEO and All in One SEO Pack can lead to issues with content optimization, metadata, and sitemap generation. It’s generally better to stick with one plugin per task to prevent conflicts.
2. Performance Concerns
Running multiple plugins that perform the same or similar functions can bloat your site and slow it down. Plugins consume resources, and the more you add, the more server resources are required to run them. If you find that your site is running slowly after installing multiple plugins for the same purpose, you may want to test and remove the redundant ones.
3. Check Plugin Documentation
Before deciding to use multiple plugins for similar functions, review the documentation for each plugin. Some plugins are designed to work together, while others may explicitly warn against using them alongside other plugins with overlapping features. For example, caching plugins often recommend turning off other caching plugins to avoid conflicts.
4. Consider Plugin Specialization
Sometimes, multiple plugins can be used together if they are specialized in different areas. For example, you can use a security plugin like Wordfence alongside a backup plugin like UpdraftPlus, as they serve different purposes. However, it’s crucial to ensure that these plugins don’t duplicate tasks, such as both trying to secure the login page or run backups simultaneously.
5. Consolidate Features When Possible
Wherever possible, opt for multifunction plugins that combine several features into one. For instance, a plugin like Jetpack provides a range of features such as security, performance optimization, and social sharing, eliminating the need for multiple plugins that each perform a separate function.
By choosing your plugins wisely and consolidating features, you can ensure that your website runs smoothly without unnecessary duplication or performance issues.
FAQ 5: How Can I Choose the Right Plugin for My WordPress Site?
With thousands of plugins available in the WordPress Plugin Directory, choosing the right plugin for your site can be overwhelming. Here’s how you can make an informed decision when selecting plugins for your WordPress site.
1. Identify Your Specific Needs
Start by identifying the exact functionality you need. Are you looking for a plugin to improve your SEO? Add contact forms? Speed up your site? Defining the problem you’re trying to solve helps you narrow down your options and focus on plugins that address your specific needs.
2. Check Plugin Reviews and Ratings
Once you have a list of potential plugins, check their reviews and ratings in the WordPress Plugin Directory. User feedback can provide insights into a plugin’s performance, reliability, and compatibility. High ratings and positive reviews typically indicate a well-maintained and effective plugin.
3. Look for Regular Updates
Plugin development is an ongoing process. A plugin that hasn’t been updated in a long time may be outdated, prone to security vulnerabilities, or incompatible with newer versions of WordPress. When selecting a plugin, ensure that it has been regularly updated to fix bugs, add new features, and maintain security.
4. Evaluate the Plugin’s Support System
Check the support options available for the plugin. A good plugin should have an active support forum, where users can ask questions and developers provide timely answers. If you run into issues while using the plugin, having access to reliable support is critical to resolving any problems quickly.
5. Test the Plugin on a Staging Site
Before installing a plugin on your live site, test it on a staging site first. This allows you to ensure the plugin works as expected without affecting your live website. Testing can help you avoid compatibility issues or conflicts that could disrupt your site’s functionality.
By carefully selecting plugins based on your specific needs and performing due diligence in evaluating their performance, reviews, and support, you can choose the right plugins to enhance your site without introducing unnecessary risks or complications.