In the digital age, having a website is no longer just a nice-to-have, it’s an essential part of building your personal brand, starting a business, or even showcasing your creative work. Whether you’re a freelancer, entrepreneur, blogger, or hobbyist, establishing an online presence allows you to reach more people, build credibility, and create new opportunities. But when it comes to choosing a platform, WordPress stands out as the clear winner, especially for beginners. With its blend of flexibility, ease of use, and expansive features, WordPress empowers users to build professional websites without writing a single line of code.
WordPress powers over 40% of all websites on the internet, and there’s a good reason for that. It’s open-source, meaning it’s completely free to use, and it’s supported by a massive global community that constantly contributes to its improvement. Unlike proprietary website builders, WordPress doesn’t lock you into a single provider or charge recurring fees just to access your own data. This level of freedom and control makes it ideal for both beginners and experienced developers alike. With WordPress, you own your website no strings attached.
Another major reason to choose WordPress is its incredible versatility. Whether you’re building a blog, an online store, a portfolio, or a business website, WordPress has the tools and features to support your goals. Thanks to thousands of themes and plugins available, you can easily customize the look and functionality of your site to suit your needs. Want to add a booking system, a gallery, or a newsletter signup? There’s a plugin for that and often more than one, giving you the freedom to choose what works best.
For beginners, WordPress strikes the perfect balance between simplicity and power. The platform’s dashboard is intuitive and user-friendly, especially with the modern block-based editor that allows you to visually build pages and posts. Yet, it doesn’t compromise on capabilities. As your skills and ambitions grow, WordPress can grow with you. What starts as a simple blog could later evolve into a full-fledged online business or community site all without needing to rebuild from scratch or migrate to a new platform.
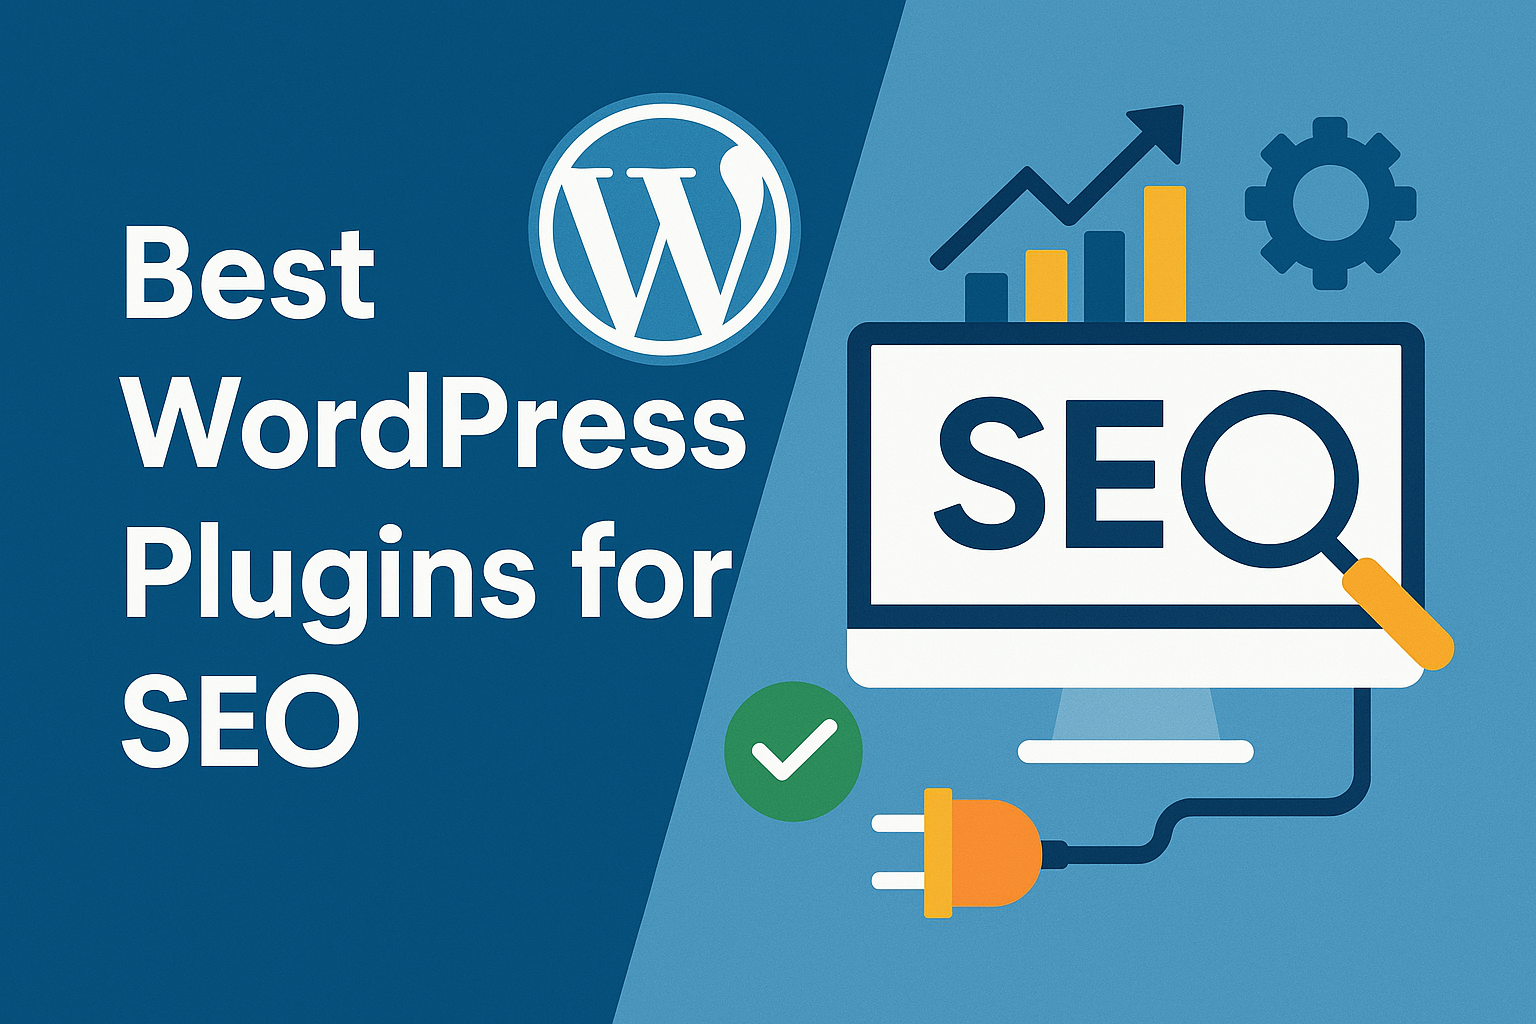
Search engine optimization (SEO) is another area where WordPress excels. Out of the box, WordPress is built with clean code that search engines love. But with the help of plugins like Yoast SEO or Rank Math, even complete beginners can optimize their content, structure their sites, and improve visibility on Google and other search engines. This is crucial for driving traffic and ensuring your website gets found by the right audience. Compared to other platforms that require advanced knowledge or additional services to achieve the same results, WordPress simplifies SEO from the start.
Security and scalability are often overlooked by beginners, but WordPress has robust support for both. Regular updates help patch vulnerabilities, and security plugins like Wordfence or Sucuri provide added protection. For those planning to scale their website over time whether by adding more pages, content, or even monetization features—WordPress can handle it all. The platform is used by massive corporations like The New Yorker, BBC America, and TechCrunch, proving it’s not just for small-scale users but for enterprise-level projects too.
In summary, WordPress offers a powerful, flexible, and beginner-friendly platform that caters to virtually every type of website. It provides full control over your site, endless customization options, strong SEO capabilities, and a supportive community that makes learning and growing easy. If you’re thinking about launching a website, there’s no better foundation than WordPress. It’s not just a tool—it’s a long-term investment in your digital future.
What You’ll Learn in This Guide
If you’ve been thinking about creating your own website but don’t know where to start, you’re in the right place. This guide is designed specifically for beginners, breaking down the entire WordPress website creation process into manageable, easy-to-follow steps. By the end of this guide, you’ll not only have your own fully functional WordPress website up and running you’ll also understand the fundamentals that go into building, maintaining, and growing a successful online presence. No tech experience required.
We start with the planning stage because a successful website always begins with a clear purpose. You’ll learn how to define your website’s goal—whether it’s for blogging, business, showcasing your portfolio, or selling products. Understanding your target audience and what they’re looking for will help guide every other decision you make. From there, we’ll walk you through choosing a domain name that reflects your brand and a reliable hosting provider that keeps your site fast and secure.
Next, we’ll dive into installing and setting up WordPress, step by step. We’ll cover one-click installations that most hosts offer, as well as the manual setup process if you’re feeling more adventurous. You’ll learn how to navigate the WordPress dashboard, understand its core features, and get comfortable with the interface. This part often feels overwhelming at first, but we’ll break it down in a way that makes sense—even if you’ve never used a content management system before.
From there, we’ll explore how to design your website. You’ll discover how to choose a theme that suits your style and goals, and how to customize it using WordPress’s built-in editor. We’ll explain what widgets are, how to set up menus, and how to create your first pages. You’ll be able to build a professional-looking homepage, add an About page, and create a Contact page with forms—all without writing a single line of code.
One of the most powerful aspects of WordPress is its plugin ecosystem. In this guide, you’ll learn how to enhance your website with plugins that add new features and functionality. Whether you want to improve your site’s SEO, create a photo gallery, add social sharing buttons, or set up an online store, there’s a plugin for that. We’ll walk you through installing, activating, and configuring the most essential plugins for beginners.
But building a website is only half the battle—you’ll also need to maintain it. That’s why we’ll also teach you how to back up your website, update plugins and themes safely, and secure your site against common threats. We’ll also cover best practices for mobile optimization, loading speed improvements, and integrating tools like Google Analytics to track your traffic. These elements ensure your site not only looks good but performs well and grows over time.
By the end of this guide, you’ll have a solid understanding of what goes into running a WordPress website. More importantly, you’ll have the confidence to take control of your own site, make updates, post content, and expand your digital footprint as your needs evolve. Whether your goal is personal expression or professional development, this guide equips you with everything you need to get started and succeed.
Planning Your Website
Before diving into the technical side of things, take time to plan your website. Think about why you’re creating it, whether it’s for blogging, business, a portfolio, or an online store. Planning gives you a sense of direction and helps you stay focused. Write down your goals and how you envision your site helping you reach them. Consider your target audience what information they’re looking for and how you can present it clearly. Sketch a rough layout of your homepage and a few key pages, like “About,” “Contact,” and “Services.” Think about your brand’s tone, colors, and personality. Planning doesn’t require expensive tools a simple notebook or digital note app will do. The better you plan now, the easier it becomes to build with confidence later.
Define Your Website’s Purpose
Before you even register a domain or install WordPress, the most important first step is defining your website’s purpose. This might sound simple, but it’s one of the most overlooked aspects by beginners. Without a clear direction, your website can become a cluttered mess confusing to visitors and frustrating for you. The purpose of your site will inform every design decision you make, from layout and content to navigation and functionality. Think of it as the foundation that everything else will be built upon.
To get started, ask yourself: Why do I want to build this website? Are you planning to start a blog to share your thoughts, tips, or travel experiences? Or are you launching a small business site to showcase your services and attract local clients? Maybe you’re a photographer or designer wanting to build a portfolio, or perhaps you’re starting an e-commerce store to sell handmade crafts. Each of these purposes requires a different setup, design style, and content structure. Getting this right from the beginning will save you time and rework down the line.
When you define your purpose, you also define your audience. Who do you want to reach with your website? A personal blog targeting fellow travelers will look and feel different from a consulting business targeting corporate clients. Identifying your ideal visitor helps you craft content, tone, and design elements that resonate with them. It’s like hosting a party you’d decorate and prepare differently for a kids’ birthday than for a business dinner. Your website is the same way.
Once your purpose and audience are clear, map out your website’s core objectives. What do you want people to do when they visit your site? Subscribe to a newsletter? Buy a product? Contact you for a quote? Read your articles? These goals will guide your site layout and the way you present content. For example, if your goal is to generate leads, your site should highlight a contact form and make it easy for people to reach you. If you’re building a portfolio, your work should be front and center, with minimal distractions.
A practical tip is to sketch out a basic structure of your site, often referred to as a sitemap. This doesn’t have to be fancy a simple outline on paper will do. Think about the pages you’ll need: Home, About, Services, Blog, Contact, maybe a FAQ or Testimonials page. This exercise will help you visualize your website before you start building it and ensures that nothing important gets left out. It also helps later when you start designing menus and navigation bars.
Don’t worry if your purpose evolves over time—most websites do. What’s important is that you start with a clear intention so you can focus your energy and avoid feeling lost. As you become more familiar with WordPress and website-building in general, you’ll have the confidence to make changes, add new pages, or shift your focus. Flexibility is a strength, but clarity is what gets you started.
Ultimately, defining your website’s purpose gives your project structure, meaning, and direction. It’s the blueprint that every other step will follow. A well-thought-out purpose ensures that your website doesn’t just exist, it works for you, whether that means building a community, marketing a service, or creating a space for your voice to be heard. With that clarity in place, you’re ready to move on to the next vital step: choosing the right domain name.
Choose a Domain Name That Represents Your Brand
Choosing a domain name is like choosing the name for your business, brand, or blog, it’s how people will remember you and find you online. It’s one of the most important branding decisions you’ll make, and it deserves thoughtful consideration. A good domain name should be easy to remember, easy to type, and give a hint about what your website is about. It sets the first impression and can influence whether someone clicks on your link or moves on to the next.
Start by brainstorming keywords that relate to your site’s purpose and your audience. If you’re building a travel blog, for example, think about words like “journey,” “globe,” “adventure,” or “explorer.” If you’re launching a business website, consider using your business name directly. It’s often best to keep your domain name short and simple avoid long, complicated phrases or difficult spellings that might confuse visitors. The goal is memorability and ease of access.
Another key tip is to aim for a .com domain whenever possible. While there are hundreds of domain extensions like .net, .org, or .co, the .com is still the gold standard and most recognized by users. If the .com version of your ideal name is unavailable, you might try small variations, like adding a keyword or location (e.g., “smithphotographyNY.com”) rather than settling for a less familiar extension that might not inspire confidence or credibility.
Before you commit, double-check your domain name’s availability using any domain registrar like GoDaddy, Namecheap, or Google Domains. Also, check social media handles. Having the same name or brand across your website and social media platforms is ideal—it keeps your branding consistent and makes you easier to find. If your desired name is taken, don’t panic. Slight tweaks like pluralizing, adding “the,” or using a hyphen can open up new possibilities—just be careful not to confuse your audience.
Also, make sure your domain doesn’t accidentally spell something inappropriate when written as one long string. A famous example is “penisland.net” for a pen-selling website which, when typed, reads very differently than intended. Always read your domain aloud and written together, and get feedback from friends or colleagues. It might save you from an embarrassing mistake later.
Once you’ve chosen your domain name, you’ll need to register it. Most hosting providers offer domain registration as part of their packages, and many even include a free domain for the first year. If you prefer, you can register your domain separately through a registrar, then connect it to your host later. Either option works fine, it comes down to convenience and preference.
Remember, your domain name is more than just an address—it’s your identity online. It plays a role in SEO, credibility, and first impressions. Taking the time to choose the right one ensures your site is easy to find, easy to share, and set up for long-term success. With your domain selected, you’re ready to move on to one of the most technical (yet crucial) decisions in website-building: selecting a hosting provider.
Selecting the Right Hosting Provider
Choosing the right hosting provider is one of the most important technical decisions you’ll make when creating a WordPress website. Your host is the home of your site, it’s where all your website files, images, databases, and content live. A good hosting provider ensures that your website runs smoothly, loads quickly, and stays secure. On the other hand, a poor host can result in downtime, slow load speeds, and even security breaches. For beginners especially, selecting a dependable host sets the tone for your entire web-building experience.
There are different types of web hosting, but for WordPress beginners, shared hosting is usually the best place to start. It’s affordable, easy to manage, and most major hosting providers offer one-click WordPress installation. Shared hosting means your site is on a server with other websites, sharing resources like memory and bandwidth. While this might sound like a downside, it’s more than sufficient for new websites with moderate traffic and gives you all the tools you need to grow.
Some of the most popular and beginner-friendly hosting providers include Bluehost, SiteGround, Hostinger, DreamHost, and A2 Hosting. These providers are known for their reliability, user-friendly interfaces, and excellent customer support. Many of them are officially recommended by WordPress itself. They offer dashboards where you can manage your domain, emails, backups, and WordPress installation with ease—no advanced tech skills required.
When comparing hosting plans, pay attention to a few key features. First, make sure your host offers free SSL certificates—this encrypts your site and shows that secure padlock in the browser, which is essential for building trust with visitors. Look for automatic backups and malware scanning, especially if you won’t be managing these aspects yourself. Also, consider the host’s uptime guarantee—ideally, it should be at least 99.9%, ensuring your site is available nearly all the time.
Performance is another major factor. A hosting provider with strong server infrastructure and built-in caching can make your site load faster, which helps with both user experience and SEO. Some hosts also offer CDN (Content Delivery Network) integration to further boost loading times, especially if you have global visitors. Speed might not seem urgent at first, but it quickly becomes important as your site starts to grow and attract traffic.
Customer support can make or break your hosting experience—especially for beginners. Look for hosts with 24/7 support via chat, email, or phone. Trustworthy providers often have robust knowledge bases, video tutorials, and community forums that can help you troubleshoot issues on your own. If something goes wrong (and eventually something always will), having helpful, patient support staff who can walk you through the problem is a major asset.
Lastly, consider pricing and renewal rates. Many hosts offer low introductory prices for the first year, but their rates may jump significantly upon renewal. Read the fine print and understand what you’re committing to. Some may offer money-back guarantees, which gives you peace of mind if you decide to switch later. Overall, investing in a reliable host from the start gives you the confidence and stability to build your WordPress website without headaches or surprises.
Installing WordPress is easier than most people think. Many hosting providers offer a one-click installation that gets you up and running in minutes. Once installed, you’ll access your WordPress Dashboard—the control center for your site. From here, you can create posts and pages, install plugins, customize your theme, and manage settings. Start by choosing a theme that matches your brand. Next, configure your basic settings—like your site title, tagline, timezone, and permalink structure. It’s also a good idea to install a few starter plugins like anti-spam, security, and SEO tools. Don’t worry about making everything perfect right away—WordPress makes it easy to adjust and refine your settings as your website evolves.
Installing and Setting Up WordPress
Installing WordPress is easier than most people think. Many hosting providers offer a one-click installation that gets you up and running in minutes. Once installed, you’ll access your WordPress Dashboard the control center for your site. From here, you can create posts and pages, install plugins, customize your theme, and manage settings. Start by choosing a theme that matches your brand. Next, configure your basic settings—like your site title, tagline, timezone, and permalink structure. It’s also a good idea to install a few starter plugins like anti-spam, security, and SEO tools. Don’t worry about making everything perfect right away—WordPress makes it easy to adjust and refine your settings as your website evolves.
How to Install WordPress (Step-by-Step)
Installing WordPress might sound intimidating at first, but thanks to modern hosting services, it’s now easier than ever especially for beginners. Most hosting providers offer a “one-click WordPress install” option that does all the heavy lifting for you. This means you don’t need to manually download files or set up databases unless you want to. The process is streamlined so you can have a functional website up and running in just a few minutes.
Once you’ve signed up with a hosting provider and connected your domain, look for a control panel usually cPanel or a custom dashboard. Inside, you’ll often see an icon labeled “WordPress Installer” or “Website” under the WordPress tools. Click it, and you’ll be guided through a setup wizard. You’ll be asked to choose the domain where you want to install WordPress. If you have more than one domain connected, make sure you select the correct one.
Next, you’ll fill in basic site details like your website name, site description (or tagline), and login credentials. Make sure to choose a strong username and password for your WordPress admin account. This login will give you full control over your site, so treat it with care. Some hosts may also allow you to choose a theme during this process, though you can always change that later.
Once everything is filled out, click “Install” and let the system do its thing. This typically takes less than a minute. When it’s done, you’ll get a success message along with your WordPress login URL, which usually looks like yourdomain.com/wp-admin. Bookmark this URL, it’s the gateway to managing your website. From here, you can start customizing, writing posts, adding pages, and more.
If your hosting provider doesn’t offer one-click installation, you can install WordPress manually. This involves downloading WordPress from WordPress.org, uploading it to your hosting account using an FTP client, creating a database through your hosting panel, and then running the WordPress setup wizard. While this method gives you more control, it’s generally unnecessary for beginners and can be skipped unless you’re working on a more advanced setup.
After a successful installation, you’ll notice that a default theme is already active, and a few sample posts or pages may have been generated. These are placeholders and can be easily edited or deleted. Your main focus now is getting comfortable with the backend of WordPress so you can start shaping your website according to your vision.
Installing WordPress is your official starting line. It’s the point where your ideas can now take form in a living, breathing website. Even though this is a technical step, it’s designed to be as beginner-friendly as possible. And once it’s complete, you’ll gain access to the dashboard a central hub that opens the door to everything WordPress has to offer.
Understanding the WordPress Dashboard
When you first log into your WordPress site, you’ll be greeted by the WordPress Dashboard the control center where everything begins. While it may seem overwhelming at first glance, the dashboard is actually quite intuitive once you get familiar with it. Think of it as your website’s cockpit: from here, you can manage content, customize appearance, install plugins, and adjust settings—all from one place.
The dashboard is divided into two main sections: the navigation menu on the left, and the workspace on the right. The left-hand menu is your primary tool. It contains links to Posts, Pages, Media, Appearance, Plugins, Users, Settings, and more. Each of these items can be expanded to reveal more detailed tools. For instance, under “Appearance,” you’ll find options for Themes, Widgets, Menus, and the Customizer.
At the top of the screen, you’ll notice a toolbar that provides quick links to view your site, add new content, or access profile settings. There’s also a quick-draft widget on the dashboard home page where you can jot down ideas for posts. This layout makes it easy to switch between the front end (what your visitors see) and the back end (what you see as the site admin).
One of the first things you should explore is the Settings section. Here, you can configure your site title, tagline, time zone, and whether your homepage displays a static page or your latest blog posts. Under Permalinks, you can choose how your URLs are structured using something like “yourdomain.com/blog-post-title” instead of the default numeric format. This is better for both SEO and readability.
You’ll also want to get comfortable with Pages and Posts. Pages are for static content like “About,” “Contact,” and “Services.” Posts are for dynamic content—usually blog articles or updates. Both use the WordPress block editor (also known as Gutenberg), which lets you build content visually using blocks for paragraphs, images, headings, and other elements. It’s very beginner-friendly and eliminates the need for any coding.
As you explore the dashboard, you’ll likely see plugin and theme notifications. These are optional tools and enhancements that extend the functionality of your site. While you don’t need to install anything right away, it’s worth noting that the dashboard will alert you when updates are available or when something requires attention. Staying up to date ensures your site remains secure and stable.
Getting comfortable with the WordPress dashboard is a crucial step in your journey. It’s where the real work happens—and where your creative ideas come to life. Don’t worry about mastering it all at once. Spend some time clicking around, exploring menus, and making small changes. The more you use it, the more confident you’ll become, and soon it will feel as natural as using any other tool you rely on daily.
Customizing Your Website Appearance
Now that your WordPress site is live and you understand how to navigate the dashboard, it’s time to make your website visually yours. Customizing the appearance is where creativity meets functionality. You get to choose how your site looks, how users interact with it, and how it reflects your personal or business brand. This process is incredibly flexible thanks to WordPress’s theme system and visual customization tools.
The first step is selecting a WordPress theme. A theme controls the overall design and layout of your website, including fonts, colors, menus, header and footer structure, and responsiveness. WordPress offers thousands of free and premium themes to choose from. You can access these by navigating to Appearance > Themes > Add New inside your dashboard. From there, you can search, preview, and install themes directly.
When choosing a theme, consider your site’s purpose. A blog, a business site, a portfolio, or an online store each benefits from different styles and features. Look for themes that are mobile-responsive, SEO-friendly, and compatible with modern plugins. Don’t just focus on looks—also read user reviews and check when the theme was last updated. Themes that are regularly maintained are more secure and reliable.
Once you’ve installed and activated a theme, go to Appearance > Customize to launch the WordPress Customizer. This is where you’ll make most of your visual adjustments. The customizer gives you a live preview of your site on the right, with various settings on the left—allowing you to tweak things like site identity (logo and tagline), colors, typography, header and footer layout, and more, depending on your theme’s features.
During customization, you can also set a static homepage and assign a different page for blog posts if you prefer a professional landing page. Additionally, you can create and edit navigation menus, add widgets to sidebars and footers, and enable or disable certain site features. Many themes offer extra settings like background images, button styles, or section overlays that let you really personalize the design.
If you’re looking for more control or specific functionality, consider using a page builder plugin like Elementor, Beaver Builder, or WPBakery. These tools let you build custom page layouts using drag-and-drop interfaces. They’re especially helpful for beginners who want to achieve a modern look without touching code. Many themes integrate seamlessly with these builders, unlocking even more design potential.
Customizing your WordPress site isn’t just about aesthetics—it’s about user experience and brand identity. A well-designed site builds trust, makes content easier to navigate, and encourages visitors to stay longer. It’s your chance to create a digital environment that feels welcoming, professional, and aligned with your goals. Take your time with this step. Experiment, preview, and refine until you’re proud of what you see.
Adding Content to Your Website
Content is the heart of your website, it’s what keeps visitors coming back. Begin with the essentials: an “About” page to introduce yourself or your business, a “Contact” page so people can reach you, and any service or product pages you need. You can also start a blog to share updates, insights, or tutorials. WordPress uses “Pages” for static content and “Posts” for blog entries. You can also add media images, videos, PDFs to enhance the user experience. Use categories and tags to organize your content and help visitors find what they need. Don’t forget navigation create clear menus and links so users can easily move around your site.
Adding Essential Plugins to Extend Functionality
Once your WordPress website is up and running with a theme that suits your brand, it’s time to enhance its capabilities by adding plugins. Plugins are like apps for your website they allow you to add new features without writing a single line of code. Whether you want to improve site security, optimize for SEO, build a contact form, or speed up your website, there’s likely a plugin that can do it. With over 60,000 free plugins available in the WordPress plugin repository, the possibilities are practically endless.
Installing a plugin is simple. From your dashboard, go to Plugins > Add New. Use the search bar to find a specific plugin or browse by category or popularity. When you find one that suits your needs, click “Install Now” and then “Activate.” That’s it you’ve just extended your website’s functionality in a few clicks. Some plugins will create a new menu item in your dashboard, while others may add options within existing sections like Settings or Tools.
So, which plugins should you install first? While the ideal mix will vary based on your site’s goals, there are several essential plugins every beginner should consider. First up is Yoast SEO or Rank Math, both of which help you optimize your content for search engines. These tools allow you to edit meta descriptions, generate sitemaps, analyze readability, and get insights into how your pages will perform in search results.
Another must-have is a security plugin like Wordfence Security or iThemes Security. These plugins provide real-time threat detection, firewall protection, and regular malware scans to keep your site safe from hackers. Pair this with a backup plugin such as UpdraftPlus, which automatically backs up your site on a schedule and allows you to restore it easily if anything goes wrong.
You’ll also want to improve your website’s speed and performance. For that, consider caching plugins like W3 Total Cache or WP Super Cache. These tools generate static versions of your site’s pages so they load faster for visitors. To take it a step further, use Smush or ShortPixel to optimize images, reducing their file size without compromising quality.
If you’re planning to collect user information or inquiries, a contact form plugin is essential. WPForms is a beginner-friendly option that allows you to build forms using a drag-and-drop editor. It can be used for contact forms, surveys, newsletter sign-ups, or even payment collection if integrated with Stripe or PayPal. Most modern plugins like this also offer templates to save you time.
Lastly, keep an eye on plugin bloat. It’s tempting to install every plugin that looks useful, but doing so can slow down your site or cause conflicts. Stick with trusted, well-reviewed plugins, and delete any you’re not actively using. Regularly update your plugins too outdated software is one of the biggest security risks in WordPress.
Plugins are a powerful part of the WordPress ecosystem. They empower you to turn a simple website into a feature-rich platform tailored to your unique needs. Whether you’re a blogger, a business owner, or an online seller, using the right combination of plugins can dramatically improve both the functionality and performance of your site. Start with the basics, explore new tools slowly, and always test changes to ensure your site stays stable and user-friendly.
Creating Your First Page
Creating your first page in WordPress is one of the most important steps in building your site. Pages are the static content of your website—unlike blog posts, which are typically published chronologically, pages stand alone and include essential areas such as your Home, About, Services, or Contact pages. These form the backbone of your site, giving visitors clear access to the information they need. Even if you’re starting with just one page, mastering how to create and format it properly lays the foundation for a professional, user-friendly experience.
To get started, log in to your WordPress dashboard and navigate to Pages > Add New. You’ll be taken to the WordPress block editor, also known as Gutenberg. This interface lets you build your page using “blocks”—each block represents a different type of content, such as text, images, headings, buttons, or even columns. The editor gives you a visual way to design your page without needing to code, which is perfect for beginners.
Begin by giving your page a clear and relevant title. For example, if you’re building a homepage, simply title it “Home.” Next, you’ll want to add a few key elements. A strong opening headline or hero section (which can include a large image and call-to-action) helps grab attention. Beneath that, you might include a short paragraph introducing your brand or mission, and perhaps a few bullet points explaining what your website offers. Use the heading blocks to break your page into readable sections this not only improves visual appeal but also helps with SEO.
Adding images is simple. Just click the “+” icon, choose the Image block, and either upload a new image or select one from your media library. You can align images, add captions, and even link them to other pages. Don’t forget to use Alt Text for accessibility and SEO purposes. You can also include buttons using the Button block, allowing users to navigate to other parts of your site—like a “Get Started” or “Learn More” call-to-action.
Once you’re happy with the content and layout, look to the right-hand sidebar where you can customize settings like the page’s URL slug, template, and visibility. You can also choose whether to publish the page immediately or schedule it for later. If your page is ready to go live, simply click “Publish” and your first official page will be available to the world.
It’s also important to note that you can always go back and edit your pages. As your content evolves, you’ll likely want to update your pages to reflect new services, promotions, or contact information. WordPress allows unlimited edits, and the block editor makes it easy to rearrange, add, or remove content as needed. You can even duplicate a page to use it as a template for future pages.
Lastly, after creating your key pages like Home, About, and Contact, make sure they’re easily accessible via your site’s navigation menu. Pages should be logically structured and interconnected for a seamless browsing experience. Don’t rush this part—clear, well-designed pages are critical to building trust with your audience and guiding them toward taking action on your site.
Publishing Your First Blog Post
Publishing your first blog post on your WordPress website is an exciting milestone. This is where your voice, ideas, and expertise begin to take shape online. Unlike pages, which are static and serve as the backbone of your website’s structure, blog posts are dynamic and frequently updated. They allow you to share timely content, build authority in your niche, engage with your audience, and improve your site’s SEO rankings over time. If your website includes a blog section, mastering how to create and publish a post will become one of your most frequent activities.
To get started, go to your WordPress dashboard and navigate to Posts > Add New. This will open the Gutenberg block editor, the same tool used for creating pages. Begin by writing a compelling title for your post, this is what readers will see first, so make it interesting and informative. A good blog title should clearly reflect what the post is about while sparking curiosity. For example, instead of “Tips for Gardening,” try something like “7 Gardening Hacks to Make Your Plants Thrive Year-Round.”
Next, begin writing the body of your post. The block editor makes it easy to structure your content using Headings (H2, H3, etc.), paragraph blocks, images, lists, and quotes. To keep your post engaging, break it into sections with clear subheadings. This helps readers skim and find the information they care about, and it also improves SEO. Each paragraph should focus on a single point or idea, written in a conversational, easy-to-understand tone. Remember: you’re writing for real people, not robots.
As you write, consider incorporating relevant keywords that your target audience may be searching for. These should occur naturally within your content—avoid keyword stuffing. Plugins like Yoast SEO or Rank Math can help you assess how well your post is optimized. They’ll guide you on aspects like keyword placement, readability, meta descriptions, and internal linking—all important elements that boost your chances of ranking in search engines.
Don’t forget to add images or other media to your blog post to make it visually appealing. Readers tend to engage more with content that includes photos, infographics, or videos. Use high-quality visuals and make sure each image has an appropriate alt tag for accessibility. You can also embed YouTube videos, audio files, or PDFs to further enrich your content. Just click the “+” button in the editor and select the appropriate media block.
Before hitting publish, take a moment to preview your post. Click the Preview button in the top right corner to see how it looks on desktop and mobile. Check for spelling and grammar errors, formatting issues, or broken links. It’s always a good idea to read through your post as if you were a first-time visitor—does it provide value? Is it easy to read? Is the message clear? Once you’re satisfied, you can click “Publish” to make it live.
You’ll also want to assign your post to a category and possibly add tags. Categories help organize your blog content into broad topics, while tags are more specific descriptors. For example, a food blog post might be under the category “Recipes” with tags like “Vegetarian,” “Quick Meals,” and “Healthy Eating.” This not only improves user navigation but also aids SEO by helping search engines understand your site’s structure.
Publishing your first blog post is a learning experience, but it’s also the beginning of a powerful content journey. Over time, your blog can become a key driver of traffic, trust, and conversion. Be consistent, stay authentic, and don’t worry if your first few posts aren’t perfect blogging is a skill that improves the more you do it. With each new article, you’ll build a stronger connection with your audience and create valuable content that serves your goals.
Adding Media (Images, Videos, Files)
Adding media to your WordPress website is one of the most powerful ways to enhance your content and engage your audience. Images, videos, audio files, and documents break up long blocks of text, create visual interest, and help explain complex ideas in a more digestible format. Whether you’re a blogger, a business owner, or running an online portfolio, using media strategically can transform a basic website into an interactive, professional-looking platform that holds your visitor’s attention.
To begin adding media, head to your WordPress dashboard and click on Media > Add New. Here, you can upload files directly from your computer, including images (JPEG, PNG, GIF), videos (MP4), audio (MP3), and documents (PDF, DOCX). Alternatively, you can also upload media while editing a page or post using the block editor. Just click the “+” icon and select the type of media block you need Image, Gallery, Audio, Video, File, or Embed.
For images, the most commonly used media type, make sure your files are optimized for web before uploading. Large image files can slow down your website, affecting both user experience and SEO. Use tools like TinyPNG, ImageOptim, or WordPress plugins such as Smush to compress images without sacrificing quality. You should also include alt text for every image, this helps screen readers describe images to visually impaired users and also tells search engines what your image is about, improving your SEO.
If you want to add multiple images, consider using the Gallery block. This feature allows you to display a set of images in a clean grid layout. You can choose how many columns you want, and whether images should link to a larger version or to an attachment page. For portfolios, photography blogs, or product showcases, galleries offer an elegant, organized way to present visuals. Many themes also come with built-in gallery styles, and plugins like Envira Gallery can offer even more customization options.
Video content is increasingly popular and highly effective. You can either upload videos directly to your Media Library or, preferably, embed them from external platforms like YouTube or Vimeo. Uploading large video files directly to WordPress isn’t ideal because it can consume server resources and slow down your site. To embed a video, simply paste the URL into a Video block or use the “Embed” block. WordPress will automatically convert the link into a playable video player—no special code required.
You can also add downloadable files such as PDFs, spreadsheets, or PowerPoint slides using the File block. This is particularly useful for sharing whitepapers, menus, course materials, eBooks, or brochures. When you upload a file using the File block, it automatically creates a clickable download link for users. Make sure your file names are clear and descriptive, and add a short explanation of what the file contains to encourage more downloads.
Managing your media files over time is crucial, especially as your library grows. WordPress automatically stores everything you upload in the Media Library, where you can search, filter, and organize files. However, if you have a content-heavy site, consider using a plugin like Media Library Organizer or FileBird to sort files into folders for easier management. This can be a game-changer when you need to reuse old files or keep track of your assets.
In short, media enriches your website and can communicate messages in ways words alone often can’t. Used thoughtfully, images can inspire emotion, videos can tell a compelling story, and downloadable files can provide additional value to your audience. As you build out your WordPress site, always think about where and how media can support your goals whether that’s educating, entertaining, or converting visitors into customers. With WordPress’s powerful media tools, you have everything you need to deliver a visually dynamic and engaging user experience.
Creating Menus and Navigation Bars
Creating menus and navigation bars is a crucial step in making your WordPress website user-friendly and intuitive. A well-structured navigation menu helps visitors easily find what they’re looking for, encourages them to explore more of your content, and improves the overall user experience. Without a clear and functional menu, even the most beautifully designed website can become frustrating to navigate. Fortunately, WordPress makes the process of building menus straightforward with its drag-and-drop interface.
To get started, navigate to Appearance > Menus in your WordPress dashboard. Here, you can create a new menu by giving it a name—such as “Main Menu” or “Primary Navigation.” Once created, you can begin adding elements to it, including pages, posts, custom links, and categories. On the left-hand side, you’ll see a list of your site’s content organized in tabs. Check the items you want to include and click Add to Menu. The selected items will then appear on the right, where you can rearrange them by dragging and dropping.
The order of your menu items matters more than you might think. Place your most important or most visited pages first—for example, “Home,” “About,” “Services,” “Blog,” and “Contact.” This hierarchy reflects both the natural flow of a user journey and SEO best practices. If you have subcategories or additional related pages, you can create dropdown menus by dragging those items slightly to the right under their parent page. Dropdowns help keep your top-level menu clean while still offering access to deeper pages.
WordPress also allows you to assign menus to specific locations on your theme. Depending on the theme you’re using, you might see menu placement options like Primary Menu, Footer Menu, or Mobile Menu. Most websites use a horizontal menu at the top of the page (often called the “header menu”) as the main source of navigation. Some themes also support sticky headers that keep the menu visible as users scroll, which can improve navigation on long pages.
For more flexibility and customization, you can use the WordPress Customizer by going to Appearance > Customize > Menus. The Customizer allows you to edit your menu and see live previews of the changes before publishing them. Here, you can also manage menu locations and create custom menu items, such as links to external websites or anchors that jump to specific sections of a page. This is especially helpful for single-page websites or landing pages.
As your site grows, you might need to expand your menu system. In addition to your primary navigation, consider adding secondary menus in the footer or sidebar. These menus can include links to privacy policies, terms of service, FAQs, or categories that don’t belong in the main navigation. Many websites also create a “mega menu” for organizing a large number of links in a visually structured layout. Plugins like Max Mega Menu or WP Mega Menu make this possible, especially useful for eCommerce or content-rich websites.
Keep in mind that your menu should be mobile responsive, meaning it adapts gracefully to smartphones and tablets. Most modern WordPress themes come with built-in mobile navigation (commonly known as the “hamburger menu”), but it’s a good idea to preview and test your site on multiple devices to ensure smooth functionality. Mobile users make up a large portion of web traffic, so ease of navigation on smaller screens is vital.
In summary, creating menus and navigation bars is not just a functional step—it’s a design decision that influences how users experience and interact with your website. A thoughtful, logical menu structure helps build trust, reduce bounce rates, and guide users toward your goals, whether that’s reading a blog, signing up for a newsletter, or making a purchase. WordPress offers all the tools you need to craft menus that are both stylish and strategic, empowering you to deliver a seamless user journey from the very first click.
Enhancing Functionality with Plugins
Plugins are one of the most powerful features of WordPress. They extend your website’s functionality without requiring any coding knowledge. Whether you want to add contact forms, SEO tools, analytics, or security features, there’s likely a plugin for it. Start with essentials like Yoast SEO for search engine optimization, WPForms for user-friendly contact forms, and Wordfence for basic security. Installing plugins is simple just head to the “Plugins” section in your dashboard, click “Add New,” and browse or search. Be mindful not to overload your site with too many plugins, as this can slow down performance. Choose well-rated, frequently updated plugins from reputable developers to keep your site efficient and secure. With the right mix, your site will be more powerful and easier to manage.
Must-Have Plugins for Beginners
Plugins are one of the most powerful features of WordPress. They allow you to expand your website’s functionality without needing to write any code. With thousands of plugins available both free and premium, it can be overwhelming to decide which ones to install, especially as a beginner. That’s why it’s helpful to start with a curated list of must-have plugins that cover the most essential features every website needs, regardless of its niche or purpose.
The first plugin every beginner should consider is Yoast SEO. Search Engine Optimization (SEO) helps your website appear higher in search results, making it easier for people to find you. Yoast SEO guides you through optimizing your content with keywords, meta descriptions, readability analysis, and more. It also automatically creates XML sitemaps and integrates with Google Search Console, making it a foundational plugin for organic growth.
Next is Akismet Anti-Spam, which helps protect your website from spam comments. Spam can clutter your blog posts and damage your site’s credibility. Akismet automatically filters out suspicious submissions and keeps your comment sections clean. For websites that allow user input like blogs or contact forms—this plugin is a huge time-saver and a critical security measure.
A plugin like Jetpack is also worth installing, especially for those who want an all-in-one solution. Jetpack offers multiple features, including security (protection from brute force attacks), performance (image lazy loading), and analytics (site stats). While some of its advanced features are paid, the free version provides more than enough tools to help beginners launch with confidence and monitor their site’s activity.
Another essential category of plugins is backup solutions. A popular and beginner-friendly choice is UpdraftPlus. This plugin allows you to schedule regular backups of your site and store them on cloud services like Google Drive or Dropbox. If your site crashes or is compromised, a backup can be a lifesaver, letting you restore everything with just a few clicks. For peace of mind, backup plugins should be one of the first things you install.
You should also install a security plugin, and Wordfence Security is one of the most trusted options. It provides a firewall, malware scanner, and login security features to help keep your site safe. Wordfence also gives real-time alerts when someone attempts to hack into your site or when a vulnerability is detected. For beginners, having this layer of protection is not just optional, it’s essential.
To enhance your website’s speed, consider LiteSpeed Cache or WP Super Cache. These plugins optimize your site by generating static versions of your pages and serving them quickly to users. Faster websites not only provide a better experience for visitors but also rank higher in search engines. Even if you’re using a quality host, a caching plugin adds that extra boost that ensures smooth performance, especially during traffic spikes.
Finally, Contact Form 7 or WPForms makes it easy to create contact forms so visitors can reach out to you directly. WPForms, in particular, is designed with beginners in mind and offers a drag-and-drop interface for creating customized forms without needing any code. Whether you’re collecting inquiries, feedback, or email signups, a form plugin helps you stay connected with your audience and build trust.
When it comes to plugins, less is more. While it’s tempting to install dozens of them, using too many can slow down your site or cause conflicts. Stick to trusted, well-reviewed plugins that are regularly updated, and only install what you truly need. By starting with these must-have plugins, you’ll cover the core functions of SEO, security, performance, backups, and user interaction all without ever touching a line of code.
How to Install and Manage Plugins
Once you understand the importance of plugins and have a list of the essentials, the next step is learning how to install and manage them effectively on your WordPress website. Thankfully, WordPress makes the process incredibly beginner-friendly, and with a few clicks, you can add powerful features to your site. However, proper management is key to keeping your website fast, secure, and conflict-free.
To install a plugin, begin by logging into your WordPress dashboard. From the left-hand menu, navigate to Plugins > Add New. You’ll be taken to the plugin repository, where you can search for the plugin you want using the search bar. For example, if you’re looking for “Yoast SEO,” simply type the name and wait for the search results. Once the plugin appears, click the Install Now button. After installation, the button will change to Activate. Click it again, and the plugin becomes active on your website.
Another method to install plugins is by uploading a ZIP file, which is useful if you’ve purchased a premium plugin or downloaded one from a third-party site. To do this, go to Plugins > Add New and click the Upload Plugin button at the top of the page. Choose the ZIP file from your computer, click Install Now, and then activate it. This process is quick and allows for customization beyond the WordPress plugin repository.
Once plugins are installed, managing them becomes part of your regular website maintenance. You can view all your installed plugins under Plugins > Installed Plugins. Here, you’ll see a list of active and inactive plugins. Each entry includes options to Activate, Deactivate, Update, or Delete the plugin. It’s a good habit to keep unused plugins deactivated or deleted to avoid unnecessary strain on your site’s performance and potential security vulnerabilities.
One of the most important aspects of plugin management is keeping them updated. Developers regularly release updates to improve functionality, fix bugs, or patch security holes. You’ll receive notifications in your dashboard when updates are available. Always backup your website before updating plugins, especially if they are critical to your site’s functionality. Most updates are seamless, but it’s wise to be cautious.
Managing plugin compatibility is another key consideration. Sometimes plugins may conflict with each other or with your theme, leading to unexpected behavior. For instance, if your contact form suddenly stops working after a new plugin is installed, it might be due to a compatibility issue. To troubleshoot, deactivate the most recently installed plugins one by one and test your site’s functionality after each change. Once you isolate the issue, you can decide whether to seek an alternative plugin or contact the developer for support.
If you want a cleaner and more efficient plugin experience, consider installing a plugin manager such as Plugin Organizer. This tool allows you to control which plugins load on specific pages or sections of your site. For example, you might not need a contact form plugin to load on your homepage—disabling it there can boost performance. Plugin organizers are especially helpful for larger sites that rely on many features but still need to remain fast and optimized.
Finally, it’s crucial to understand that plugins come with responsibility. They are not “set it and forget it” tools. Every plugin adds weight to your site, so each one should serve a purpose. Regularly audit your plugin list ask yourself if each one is still needed or if a lighter alternative exists. If you no longer use a plugin, deactivate and delete it. Fewer plugins mean fewer updates, fewer security risks, and faster load times.
In summary, installing and managing plugins is one of the simplest yet most impactful skills you’ll develop in WordPress. They empower your site with essential features, help automate complex tasks, and create a better experience for your users. With careful selection, consistent maintenance, and mindful usage, plugins become powerful allies in your journey to building a fully functional, professional WordPress website.
SEO, Speed & Mobile Optimization
Optimizing your website is key to success. Start with SEO (Search Engine Optimization) to help people find your site on Google. Use an SEO plugin like Yoast or Rank Math to guide you through keyword usage, meta descriptions, and readability. Next, improve site speed by optimizing images, using caching plugins, and choosing a lightweight theme. Fast websites not only rank higher but keep visitors engaged. Lastly, your website must be mobile-friendly, as more than half of web traffic now comes from phones. Choose a responsive theme and always test how your pages look on different devices. Google’s Mobile-Friendly Test tool can help with that. These three factors SEO, speed, and mobile optimization work hand in hand to ensure your website performs at its best and reaches more users.
Basic WordPress SEO Setup
Search Engine Optimization (SEO) is the foundation of driving organic traffic to your WordPress website. For beginners, SEO might seem intimidating at first, but WordPress makes it relatively simple to get the basics right. The platform itself is SEO-friendly out of the box, but to get the most from your content, you’ll need to configure a few essential settings and utilize helpful tools.
The first step in your SEO setup should be installing a reputable SEO plugin. As mentioned earlier, Yoast SEO is one of the most popular and user-friendly choices. After installing and activating it, you’ll gain access to a powerful dashboard that guides you through optimizing each page and post. Yoast evaluates your content based on target keywords, readability, and other SEO criteria, offering tips to improve your chances of ranking on search engines.
Next, configure your permalink settings. By default, WordPress might use URLs that contain numbers and symbols, which aren’t helpful to search engines or humans. To make your URLs clean and descriptive, go to Settings > Permalinks and choose the “Post name” structure. This ensures your blog posts and pages have URLs like www.yoursite.com/sample-post, which are more SEO-friendly.
Another important area is meta titles and descriptions. These appear in search engine results and influence whether users click on your content. With a plugin like Yoast, you can easily edit the meta information for each page or post. Your titles should include relevant keywords while being compelling enough to encourage clicks. Descriptions should offer a concise summary of the content, again including the main keyword naturally.
You’ll also want to create an XML sitemap, which helps search engines crawl and index your website efficiently. Fortunately, most SEO plugins will generate this automatically. Once created, you can submit the sitemap to Google Search Console, a free tool from Google that lets you monitor your site’s performance in search results, identify indexing issues, and view keyword analytics.
Another valuable setup tip is enabling breadcrumbs navigation. This feature displays the path of pages a user has navigated through, like Home > Blog > Post Title. It helps both users and search engines understand your site’s structure. Yoast SEO includes built-in support for breadcrumbs, which can be added through your theme settings or with a bit of manual code placement, depending on your theme’s capabilities.
Make sure to focus on image optimization as part of your SEO strategy. Images should be appropriately sized and include descriptive filenames and “alt text” that helps search engines understand what the image represents. Alt text is especially important for accessibility and for helping your content appear in image searches, broadening your visibility.
Finally, don’t overlook internal linking. Connecting your blog posts and pages through internal links helps users navigate your content more easily and allows search engines to crawl your site more efficiently. When you write a new post, consider what other existing posts it relates to and include contextual links. Over time, this builds a strong internal network that boosts your authority and user experience.
By setting up these basic SEO elements, you create a solid foundation for your WordPress website’s visibility. While advanced SEO strategies can come later, these beginner steps go a long way in making sure your content reaches the right audience. SEO is a long game, but starting early with proper configuration can significantly improve your chances of long-term growth and success.
Speed Optimization Tips
Website speed plays a critical role in user experience and search engine rankings. A slow website can drive away visitors before your content even loads, negatively impacting your bounce rate, conversion rate, and overall credibility. Fortunately, WordPress offers a wide range of tools and techniques to enhance your site’s performance, even if you’re a complete beginner.
The first and most significant factor influencing website speed is your hosting provider. A quality host with optimized servers ensures your website loads quickly and reliably. Shared hosting plans may be affordable, but they can slow down during traffic spikes. Consider using managed WordPress hosting or a reputable host known for performance if speed is a top priority. Some providers even offer built-in caching and CDN options, which we’ll cover shortly.
Caching is one of the most effective ways to boost your site’s loading speed. When a user visits your site, WordPress dynamically generates the page by retrieving content from the database. Caching plugins save a static version of your pages so they can be served instantly without repeatedly querying the database. Popular caching plugins like WP Super Cache, W3 Total Cache, and WP Fastest Cache can drastically improve load times with minimal setup required.
Another powerful technique is using a Content Delivery Network (CDN). A CDN stores copies of your site’s static content—like images, CSS, and JavaScript files—on multiple servers across the globe. When a user accesses your website, the CDN delivers content from the nearest server location, reducing latency and improving load speed. Services like Cloudflare or KeyCDN integrate easily with WordPress and offer free plans that are sufficient for most beginner sites.
Optimizing your images is another simple yet highly effective strategy. Uncompressed, large images can significantly slow down your site. Before uploading images to WordPress, resize them to appropriate dimensions and use tools like TinyPNG or ImageOptim to reduce file size without compromising quality. Additionally, WordPress plugins such as Smush, ShortPixel, or EWWW Image Optimizer automate this process for every image you upload.
Your theme choice also has a big impact on speed. While flashy themes with lots of animations and features might look appealing, they can bloat your website and reduce performance. Opt for lightweight, well-coded themes like Astra, GeneratePress, or Neve, which are specifically built for speed and simplicity. These themes are highly customizable while maintaining fast load times.
Don’t forget to limit the number of plugins you use. While plugins are great for adding features, each one adds additional code that your site has to load. Poorly coded plugins can slow down your site or even cause conflicts. Regularly review your installed plugins, deactivate and delete those that are no longer needed, and always keep the essential ones updated. Less is more when it comes to plugin management for performance.
Lastly, consider minifying and combining files such as CSS, JavaScript, and HTML. These files often contain spaces, comments, and extra formatting that make them easier to read but unnecessary for browsers. Minification removes those extras, and combining multiple files into one reduces the number of requests needed to load a page. Plugins like Autoptimize or Asset CleanUp handle this automatically and are beginner-friendly to set up.
Speed optimization doesn’t have to be overwhelming. With a few smart adjustments and the right tools, your WordPress website can run efficiently even with limited technical knowledge. Fast websites not only keep users engaged longer but also enjoy better visibility on search engines. Prioritizing performance from the beginning gives your site a significant edge as it grows in traffic and complexity.
Making Your Website Mobile-Friendly
In today’s digital landscape, having a mobile-friendly website isn’t optional, it’s essential. With more than half of global web traffic coming from mobile devices, users expect websites to look and function flawlessly on smartphones and tablets. Moreover, Google uses mobile-first indexing, meaning it primarily evaluates the mobile version of your site for search rankings. For WordPress users, ensuring mobile compatibility is entirely achievable with the right steps and tools.
The first thing to consider is your WordPress theme. Not all themes are created equal, and some older or overly complex themes may not offer full mobile responsiveness. A responsive theme automatically adjusts your site’s layout and content to fit various screen sizes. Popular lightweight and mobile-optimized themes like Astra, OceanWP, and GeneratePress provide a solid foundation. Before choosing a theme, always preview its demo on both desktop and mobile devices to assess responsiveness.
Once your theme is set, you’ll want to test your current site’s mobile performance. Use tools like Google’s Mobile-Friendly Test or PageSpeed Insights to see how your site performs on smaller screens. These tools provide actionable recommendations, such as fixing clickable elements that are too close together, reducing font sizes, or eliminating mobile render-blocking scripts. Even small tweaks based on these suggestions can make a big difference in user experience.
Navigation is a crucial aspect of mobile design. While a full desktop menu with multiple dropdowns may work well on a large screen, it can become cumbersome on a smartphone. Most modern WordPress themes include a mobile “hamburger menu”—a collapsible menu icon that expands when tapped. Keep your mobile navigation concise and intuitive by prioritizing key pages, avoiding unnecessary menu items, and ensuring buttons are large enough to tap without difficulty.
Another key element is font and button size. Text that looks fine on desktop may be illegible on a phone. Aim for a minimum body font size of 16px and avoid using overly elaborate fonts that may be hard to read. Similarly, buttons and links should be large and spaced enough to be tapped easily. WordPress page builders like Elementor or Beaver Builder let you preview and adjust font and element sizes based on device type, making it easier to create a responsive design.
When adding media like images and videos, ensure they scale appropriately across all devices. Large fixed-size images can cause layout issues on smaller screens. Use relative sizing (like percentages) or “max-width: 100%” in your CSS to make sure images adapt smoothly. Most modern themes and the WordPress block editor handle this automatically, but double-check your media elements using mobile previews. Embedding responsive video players via YouTube or Vimeo also ensures better playback on mobile.
Touch functionality is often overlooked. Mobile users interact with screens using their fingers, not a mouse, so hover effects don’t work the same way. Design your site so that all critical actions like tapping buttons, opening menus, and submitting forms—can be done easily with a finger. Forms should be short and simple, and fields should use proper input types (like email, number, or date) to bring up the right keyboard on mobile devices.
Finally, use a mobile preview feature to assess your changes in real-time. The WordPress Customizer and many page builders include a responsive preview tool that lets you toggle between desktop, tablet, and phone views. Make it a habit to check your site’s appearance in all formats before publishing. You can also physically test your site on various devices to ensure the experience is smooth and consistent across platforms.
Creating a mobile-friendly WordPress site is all about prioritizing user experience, simplicity, and responsiveness. Mobile users are often multitasking or on the go, so your site must be fast, easy to navigate, and visually clean. By starting with a responsive theme, optimizing navigation, and testing frequently, you’ll build a website that performs well on any device and keeps visitors engaged regardless of how they access your content.
Securing and Maintaining Your Website
Keeping your website secure and up-to-date is crucial. WordPress is secure by design, but vulnerabilities can arise if you’re not proactive. Begin with strong passwords and an SSL certificate to encrypt data. Next, install a security plugin like Wordfence or Sucuri to monitor for threats and block malicious activity. Regularly update WordPress core files, themes, and plugins to fix bugs and patch security issues. Don’t forget about backups—use plugins like UpdraftPlus to create automatic backups so you can restore your site in case of failure. Lastly, manage comments to prevent spam by enabling moderation and using anti-spam tools. Maintenance may not seem exciting, but it’s essential to keep your site healthy and protect your investment over the long term.
Setting Up WordPress Security Basics
Security is one of the most crucial aspects of managing a WordPress website, especially for beginners who may underestimate the risks. WordPress powers a significant portion of the internet, making it a frequent target for hackers, bots, and malicious software. While WordPress is secure at its core, vulnerabilities can arise from poor practices, outdated components, or weak user access controls. By setting up a few essential security basics, you can significantly reduce your site’s exposure to threats.
The first and most important line of defense is your username and password. It might sound simple, but using “admin” as your username or weak, guessable passwords like “123456” or “password” is a common mistake. During installation, create a unique username and a strong password that includes a mix of letters, numbers, and symbols. Consider using a password manager to generate and store secure credentials.
Next, you should install a reliable security plugin. There are several excellent options tailored to beginners, such as Wordfence Security, iThemes Security, and Sucuri Security. These plugins offer features like malware scanning, firewall protection, login attempt limits, and alerts for suspicious activity. Once installed, these plugins walk you through essential setup steps and make ongoing security management much easier.
Limit login attempts to prevent brute-force attacks, which involve repeatedly trying to guess your login credentials. WordPress allows unlimited login attempts by default, which can be exploited. Security plugins can restrict the number of failed attempts before temporarily locking the user out. This small step alone can block many unauthorized access attempts.
Two-factor authentication (2FA) is another highly effective security layer. With 2FA enabled, logging into your WordPress dashboard requires both your password and a second form of verification typically a code sent to your phone or generated by an authentication app. Many security plugins offer built-in 2FA options, or you can use third-party apps like Google Authenticator or Authy for added protection.
You should also consider changing the default login URL of your WordPress site. Hackers commonly target the standard /wp-admin or /wp-login.php paths. Plugins like WPS Hide Login allow you to set a custom login URL, adding a small but useful barrier to unwanted visitors. This won’t stop all attacks, but it can help reduce exposure to automated login attempts.
Another best practice is to assign the correct user roles and permissions. Not everyone who accesses your site needs full administrative power. WordPress comes with several user roles, such as Editor, Author, Contributor, and Subscriber each with a different set of permissions. Only trusted individuals should have administrative access, and you should regularly review and update user permissions.
Lastly, keep WordPress core, themes, and plugins up to date. Most WordPress security breaches stem from outdated software. Updates often include security patches that fix vulnerabilities, so installing them promptly is critical. Enable automatic updates for minor WordPress releases and make it a routine to check for updates in your dashboard. Keeping your site current is one of the simplest and most effective ways to stay secure.
By implementing these WordPress security basics, you create a strong foundation that protects your site from common threats. Security should never be an afterthought—it’s an ongoing responsibility that requires attention and action. With just a few proactive measures, you’ll ensure that your website remains a safe space for both you and your visitors.
Regular Backups and Updates
Backing up your WordPress website regularly is one of the smartest things you can do to protect your work. Imagine spending hours building your site, uploading content, installing plugins, and customizing the design—only to lose everything due to a server crash, hacker attack, or simple human error. Without a backup, restoring your site could be time-consuming, expensive, or even impossible. Fortunately, WordPress makes it easy to automate backups and manage updates to keep your site safe and up to date.
Backups serve as a safety net. If something goes wrong—whether from a bad plugin update, theme conflict, malware infection, or accidental deletion—you can simply restore your site to a previous working version. A complete backup should include both your database (which stores your content, settings, and user data) and your files (themes, plugins, uploads, etc.). There are two types of backups: manual and automated. While manual backups can be useful, especially before a major update, automated backups provide consistent protection without requiring constant attention.
There are many excellent WordPress backup plugins available for beginners. Popular options include UpdraftPlus, BackupBuddy, and Jetpack Backup. These tools allow you to schedule automatic backups on a daily, weekly, or monthly basis, and they often offer the ability to store backups remotely via services like Google Drive, Dropbox, Amazon S3, or your email. This offsite storage is crucial keeping backups on the same server as your website defeats the purpose if the server crashes or gets compromised.
When configuring backups, consider the frequency and retention policy. How often you back up your site depends on how frequently you update it. If you publish content daily, daily backups are essential. For smaller static sites, weekly backups may be sufficient. Additionally, make sure you keep multiple versions of backups—don’t just overwrite the last one. This allows you to revert to earlier states if the most recent version is also corrupted.
In addition to backups, keeping your WordPress core, plugins, and themes updated is another cornerstone of site maintenance. Developers release updates not only to improve features but also to fix security vulnerabilities and bugs. Delaying updates can leave your site exposed to known exploits, making it a target for automated attacks. The WordPress dashboard clearly displays any pending updates, and you can choose to update manually or enable automatic updates for specific items.
While enabling automatic updates for minor WordPress core releases is generally safe, some users prefer to manually update themes and plugins to ensure compatibility. Before updating anything major especially themes or complex plugins, it’s wise to back up your site. This way, if an update causes layout issues or plugin conflicts, you can roll back to the stable version. UpdraftPlus and similar plugins allow one-click restoration, making this process straightforward.
Finally, test your backups regularly. Just having a backup isn’t enough you need to confirm that it works. Some backup plugins offer staging or test restore features that let you verify functionality without affecting the live site. Alternatively, download a backup and try restoring it on a local WordPress environment using tools like Local by Flywheel or XAMPP. Knowing your backup works can save you enormous stress in a real emergency.
By prioritizing regular backups and updates, you’re actively safeguarding your time, effort, and data. These simple practices give you peace of mind and a reliable fallback in case of any website mishap. Whether you’re managing a personal blog, portfolio, or small business website, making backups part of your routine and staying up to date ensures that your WordPress site remains secure, fast, and fully functional for your audience.
Managing Comments and Spam
One of WordPress’s strengths is its built-in commenting system, which allows visitors to engage with your content, share feedback, ask questions, and build a sense of community. Especially for blogs and content-driven websites, comments can drive interaction, build trust, and create a lively space for discussion. However, with this interaction comes a challenge that every site owner eventually faces: spam. Managing comments while keeping spam at bay is essential for maintaining a professional, trustworthy website.
WordPress automatically includes a comment section on posts by default, and depending on your theme settings, you can also enable them on pages. While this feature enhances engagement, it requires ongoing moderation. Without proper settings in place, your comment sections can quickly be overrun by spam bots posting irrelevant links, promotional messages, or even malicious content. Left unchecked, these spam comments can harm your SEO, slow down your site, and make you look unprofessional to genuine readers.
To begin managing comments effectively, start with the discussion settings in your WordPress dashboard under Settings > Discussion. Here, you can configure how comments are displayed, who can comment, and whether a comment must be manually approved. For most beginners, enabling the option “Comment must be manually approved” is a smart choice. This puts you in control and allows you to review every submission before it appears on your site.
Another key setting is requiring users to register and log in before commenting, which can drastically reduce spam. Alternatively, you can enable comment moderation only for first-time commenters. This approach lets returning visitors post freely after their first approved comment, striking a balance between openness and protection. You can also hold comments containing links in moderation—spam often contains multiple URLs and promotional material.
To fight spam more effectively, consider using an anti-spam plugin. The most widely used and beginner-friendly option is Akismet Anti-Spam, which comes pre-installed with WordPress. Akismet automatically checks comments and filters out the ones that look like spam. Over time, it learns from patterns and improves its accuracy. Other options like Antispam Bee and WPBruiser offer additional customization and are equally effective, depending on your needs.
In addition to plugins, you can add CAPTCHA verification to your comment forms. Tools like reCAPTCHA by Google ensure that only real users can post by requiring them to complete a quick task or checkbox. This is an excellent way to block automated bots without discouraging human interaction. Many form and security plugins, such as WPForms and Wordfence, support CAPTCHA integration and make setup easy even for beginners.
It’s also a good idea to regularly clean up your comment queue. Even with filters in place, some spam might sneak through, especially if your site gains popularity. Go through your pending, approved, and spam comment sections regularly. Deleting spam in bulk keeps your database clean and ensures that your readers only see relevant, thoughtful contributions. Most importantly, always reply to genuine comments—this encourages future interaction and shows visitors that you value their input.
In summary, managing comments effectively is about striking the right balance between openness and control. A well-maintained comment section enhances user engagement, builds community, and boosts your credibility. At the same time, you must protect your site from spam and abuse. With the right settings, plugins, and moderation practices, your WordPress website can host a healthy, engaging discussion platform that enriches the user experience while keeping unwanted content at bay.
Finalizing and Going Live
Once your website looks good and functions well, it’s time for the exciting part: going live. Before launching, thoroughly preview and test your site. Check all pages, links, forms, and menus on different devices and browsers. Make sure everything loads quickly and displays correctly. Then, connect your website to Google Analytics and Search Console to track visitor data and monitor performance. This will help you make data-driven decisions as your site grows. Finally, hit that publish button and announce your launch on social media, email, or wherever your audience hangs out. Launching your WordPress site is a big step—but with all the planning, content, and optimizations in place, you’re ready to go live with confidence and purpose.
Previewing and Testing Your Website
Before launching your WordPress website to the public, it’s essential to conduct a thorough review through previewing and testing. This stage allows you to catch any issues, fine-tune the user experience, and ensure everything works exactly as intended. A website that hasn’t been properly tested may appear broken or unprofessional, leading to poor user engagement and high bounce rates. Think of this phase as your last line of defense before unveiling your work to the world.
Start by previewing your website using the Customize panel in WordPress. This feature allows you to see what your site will look like on desktop, tablet, and mobile screens without making changes live. As you preview, check for layout consistency, proper spacing, and how different elements like headers, buttons, and widgets appear on various devices. Mobile responsiveness is especially important since a growing percentage of users will be accessing your site via smartphones or tablets.
Next, test all interactive elements such as buttons, contact forms, and menus. Make sure each menu item directs to the correct page, and that buttons trigger the appropriate actions. If you have forms on your site such as contact, newsletter signup, or inquiry forms submit test entries to confirm they are received and that thank-you or confirmation messages appear. Broken forms are a common issue and can lead to lost leads or user frustration.
Ensure that internal and external links are working. Go through each page and blog post and click on every link to ensure it directs users to the right destination. Dead links not only confuse your audience but can also damage your site’s SEO ranking. You can use free tools like Broken Link Checker (plugin or online) to speed up this process. Also, double-check that downloadable resources, embedded videos, and images are functioning correctly.
Another important area to test is page speed and performance. Use tools like Google PageSpeed Insights, GTmetrix, or Pingdom to test your site’s loading speed and receive suggestions for improvement. Slow-loading websites deter users and increase bounce rates. If performance is an issue, consider optimizing image sizes, minimizing CSS/JavaScript, and enabling caching plugins to boost loading times.
It’s also a good time to ensure cross-browser compatibility. Not all users will access your site using the same browser. Test your website on Chrome, Firefox, Safari, Edge, and even mobile browsers to make sure everything appears correctly and functions smoothly. Sometimes, themes or plugins may behave differently depending on the browser, so this step ensures a consistent user experience across the board.
Finally, test user flow and overall navigation. Try to experience your site from a visitor’s perspective. Ask friends or colleagues to go through your website and provide feedback on its clarity, layout, and ease of use. Can they find what they need quickly? Do they understand your site’s purpose and value within seconds? Their insights can help you spot oversights or areas that need improvement before going live.
By investing time into previewing and testing your site thoroughly, you ensure that your launch will be as seamless and impressive as possible. This process may seem tedious, but it’s vital to delivering a professional, functional, and user-friendly website. Remember, first impressions are powerful—and testing ensures yours will be a positive one.
Connecting to Google Analytics and Search Console
Once your website is visually polished and functionally tested, the next step before launch is connecting it to tools that help you measure its performance and visibility. Two essential platforms you should integrate with are Google Analytics and Google Search Console. These tools provide valuable insights into your website’s traffic, user behavior, and search engine presence, all of which are crucial for long-term growth and improvement.
Google Analytics allows you to track who is visiting your website, how they found you, what pages they’re visiting, how long they’re staying, and much more. To set it up, you’ll need a Google account. Simply go to analytics.google.com, sign in, and create a new property for your website. After filling in basic details like your website name, URL, and industry category, you’ll be provided with a Tracking ID or Global Site Tag (gtag.js). This code must be added to your WordPress site so Google can begin collecting data.
There are several ways to add the Analytics tracking code to WordPress. One beginner-friendly method is using a plugin like Site Kit by Google, which not only helps integrate Google Analytics but also connects other services like Search Console, AdSense, and PageSpeed Insights. Another popular option is MonsterInsights, a plugin specifically designed to bring Google Analytics reports right into your WordPress dashboard. These tools eliminate the need for manual code entry and simplify setup.
Once Google Analytics is active, you’ll start collecting real-time data. You can monitor metrics like sessions, bounce rates, average session duration, and traffic sources. This data helps you identify which pages are popular, where your visitors come from, and what devices they use. Over time, it allows you to make informed decisions on content, design, marketing, and performance improvements. For instance, if most users are leaving your site after visiting a particular page, it might need better content or navigation options.
Google Search Console is another free tool by Google that focuses more on how your website performs in search results. It shows which queries bring users to your site, how often your pages appear in search results (impressions), and your average position in those results. It also alerts you to any issues like crawl errors, mobile usability problems, or manual penalties that could be affecting your visibility.
To set up Search Console, visit search.google.com/search-console and click “Add Property.” You’ll have the option to verify your domain either via DNS (recommended for advanced users) or URL prefix. If you’re using Site Kit or Yoast SEO, the plugin can handle the verification process automatically using a meta tag. Once verified, Google begins tracking your site’s search performance.
Linking Google Analytics and Search Console together allows even deeper insights. You’ll be able to correlate keyword performance with user behavior, which pages generate the most clicks, and how traffic varies across different sources. This is particularly useful when you begin implementing SEO strategies, as it gives you clear evidence of what’s working and what’s not.
Monitoring these tools regularly can help you set goals, refine your content, and grow your online presence strategically. For instance, if your analytics show high bounce rates on certain posts, you may need to improve their formatting, speed, or CTA clarity. Or, if Search Console reveals that you’re ranking on page two for certain queries, optimizing those posts further might push you to page one.
Launching Your Website to the Public
After all the building, designing, testing, and configuring, you’ve arrived at the big moment—launching your WordPress website to the public. This step is more than just flipping a switch. It’s about ensuring everything is polished and ready, and then making your website accessible for the world to see. A successful launch sets the tone for your brand and establishes your online presence with confidence and clarity.
Before officially launching, revisit your checklist one more time. Is every page completed and proofread? Are your contact forms working? Have all broken links been fixed? Is your SEO optimized, and are your analytics tools connected? Think of it as rehearsing for an important performance—you want every detail to be ready. Make sure legal pages like privacy policy, terms of use, and cookie notices are also in place, especially if you’re collecting user data or running an online store.
Next, if you’ve been working in maintenance mode or using a “Coming Soon” plugin, now is the time to deactivate it. This removes any barriers and allows your website to be fully accessible to the public. You can do this easily within the plugin settings or appearance settings, depending on how you had the mode enabled. Be sure to clear your website cache so changes are visible right away.
Once your site is live, it’s time to spread the word. Announce your launch across all of your social media channels, email newsletters, and relevant communities. Create a compelling message with a strong call-to-action, encouraging visitors to explore your site, sign up for updates, or make a purchase. If you have a blog, consider writing a “Launch Post” sharing your journey, the purpose of the site, and what users can expect going forward.
It’s also wise to submit your sitemap to Google via Search Console. This tells Google how your site is structured and helps get your pages indexed faster. Most SEO plugins like Yoast or All in One SEO automatically generate sitemaps for you, which you can copy and paste into Search Console’s sitemap field. This step ensures that your site appears in search results sooner rather than later.
Monitor your website closely during the first few days post-launch. Use Google Analytics and other monitoring tools to track performance, user behavior, and any unexpected errors. Be ready to address minor issues that pop up, such as typos, misdirected links, or slow-loading images. It’s common for small oversights to become apparent only after a site goes live, so stay responsive and proactive.
If your site includes interactive components like comments, forums, or e-commerce, start engaging with users right away. Respond to comments, thank visitors for their feedback, and encourage sharing. This early engagement not only builds trust but also boosts your website’s activity and social signals, which are valuable for SEO and user retention.
In the days following your launch, continue promoting your content and monitoring your progress. Launching your site is just the beginning. Now begins the process of growing your audience, improving content, optimizing performance, and building authority in your niche. Celebrate the achievement—you’ve successfully launched a WordPress website from scratch. But remember, a website is a living entity. Keep nurturing it, and the rewards will follow.
Updating, Expanding, and Growing Your WordPress Website
The moment your WordPress website goes live is a huge milestone but it’s not the finish line. In fact, it’s just the beginning of your journey. A website isn’t a one-time project; it’s a living, evolving platform that needs consistent care, strategic updates, and a growth mindset. If you want your website to stay relevant, useful, and competitive, it’s essential to actively update, expand, and grow it over time.
The first and most obvious task is updating content regularly. No matter how brilliant your initial posts or pages are, content can quickly become outdated. Regularly review your blog posts, landing pages, and any important informational sections to ensure they reflect current data, trends, and brand direction. Update product details, prices, event dates, and any expired links. Keeping your content fresh not only improves your users’ experience but also boosts SEO performance, as search engines reward regularly maintained websites.
Expanding your website with new content and features is equally important. Consider starting a blog if you haven’t already—this is a powerful way to share knowledge, build trust, and improve your visibility in search results. You can also add new sections like customer testimonials, portfolios, resource libraries, or frequently asked questions. As your audience grows, so too should your offerings. Keep thinking from your users’ perspective: what else would be useful, engaging, or inspiring to them?
Another key to website growth is listening to analytics and feedback. Now that you’ve connected Google Analytics and Search Console, use the data they provide. Which pages are attracting the most traffic? Where are users bouncing off? Which keywords are driving traffic? Combine these insights with real user feedback from comments, emails, or surveys to guide your updates. You don’t have to guess what your audience wants—let the data and dialogue show you.
Over time, consider adding more advanced functionality through plugins or integrations. Maybe you’ll want to add an email subscription form, set up a full e-commerce system, introduce membership content, or integrate with customer relationship tools. The WordPress ecosystem is flexible and scalable, allowing your website to grow alongside your business or personal goals. Just remember that as your site grows, so do its demands keep performance, security, and user experience in focus.
Consistency is the secret to long-term success. Set a schedule for checking your website’s performance, publishing new content, and updating existing information. Even just 30–60 minutes per week can make a huge difference. Treat your website like a garden, it doesn’t need to be rebuilt every season, but it does need regular watering, pruning, and care to stay healthy and attractive.
If growth is a key objective, it’s also worth considering content marketing and outreach strategies. Share your blog posts on social media, guest post on other websites, and collaborate with influencers or related brands in your niche. The more people know about your site, the more traffic you can attract, and the more value you can offer. With time and consistent effort, you’ll build credibility and attract a loyal audience.
Finally, always keep learning. The web evolves rapidly, and WordPress regularly releases updates and new features. Follow trusted blogs, take free online courses, and stay connected to the WordPress community through forums, newsletters, and webinars. Your growth as a website owner or creator is what ultimately determines your site’s growth. By staying curious, proactive, and committed, you’ll not only maintain your WordPress website you’ll make it thrive.
ALSO READ: How to Install a WordPress Theme Manually or Automatically
Conclusion
Creating your own WordPress website may seem overwhelming at first, especially if you’re new to the world of web development. But as we’ve explored throughout this comprehensive guide, taking it one step at a time transforms the process from intimidating to empowering. Whether you’re launching a personal blog, an online business, a portfolio, or a community platform, WordPress offers the flexibility, ease, and scalability to bring your vision to life, no coding required.
We began this journey by understanding why it’s worth creating a WordPress website in the first place. With its user-friendly interface, powerful features, and a supportive global community, WordPress continues to be the top choice for beginners and professionals alike. From there, we outlined exactly what you’d learn in this guide: a step-by-step breakdown from planning and installation all the way to optimizing and growing your site.
You then learned how to plan your website thoughtfully, starting with identifying your purpose, choosing a brand-aligned domain name, and selecting a reliable hosting provider. Planning is more than just a formality, it lays the foundation for a website that’s not only functional but meaningful to your goals and your audience.
From there, we walked through the technical installation of WordPress, explored the dashboard, and dived deep into how to personalize your site’s appearance. You discovered how themes and customizations can shape your brand identity, and how important it is to strike a balance between creativity and usability.
Next, we covered how to create and manage content, from writing your first pages and blog posts to organizing your site with menus and media. These core features turn your site from a blank canvas into a dynamic experience for your visitors.
We also explored essential plugins, which unlock additional functionality for SEO, contact forms, backups, and more. Managing plugins properly allows your site to grow and adapt without cluttering it with unnecessary tools.
Then came an important chapter on SEO, speed, and mobile optimization, all of which are vital for making sure your site gets found, loads fast, and works well across all devices. In today’s digital landscape, these factors are not optional; they’re foundational.
We didn’t stop there. The blog post went on to highlight how to secure your website, set up backups, manage comments and spam, and most importantly, test and launch your website properly. These practical steps ensure that your site not only looks good but also functions smoothly, performs securely, and delivers a reliable experience to your visitors.
Finally, we ended with the importance of continuous improvement, from content updates and growth strategies to monitoring analytics and expanding features. Your website is never truly “done” it evolves as you do.
By following the 25 outlined steps, you’ve learned how to go from having no website at all to running a fully functional, visually appealing, and strategically optimized WordPress site. This isn’t just about launching a site, it’s about building your presence online, on your own terms. OFFICIAL LINK
FAQs
FAQ 1: Can I Build a WordPress Website Without Any Coding Experience?
Yes absolutely. One of the best things about WordPress is that you don’t need any coding knowledge to build a beautiful, fully functional website. The platform was designed to be accessible for beginners, and it’s now more intuitive than ever thanks to drag-and-drop editors, pre-made themes, and user-friendly settings.
Most tasks on WordPress like writing blog posts, customizing layouts, installing plugins, and uploading images can be handled through visual menus and tools. With builders like Elementor, Divi, or even the native Gutenberg block editor, you can design pages visually, just like using a presentation tool. Everything is “what you see is what you get,” which makes website creation feel less like programming and more like editing a document.
While you may encounter some technical terms along the way (such as “permalinks” or “widgets”), most can be learned quickly or handled with tutorials. Plus, the WordPress community is huge, meaning you can find answers to almost any question with a quick Google search or by visiting forums like WordPress.org or Stack Overflow.
Of course, learning some basic HTML or CSS can help you fine-tune your design later, but it’s by no means required. In fact, millions of successful bloggers, entrepreneurs, and creatives run powerful WordPress sites without ever writing a line of code.
So if you’ve been hesitating to get started because you’re not “tech-savvy,” let that fear go. WordPress is built for people just like you—those who want full control over their online presence without having to become a developer. With a little guidance and patience, you’ll be amazed at what you can create.
FAQ 2: How Much Does It Cost to Create and Maintain a WordPress Website?
The cost of a WordPress website can range from very affordable to premium, depending on your needs and choices. Let’s break it down so you can see where your money might go.
Domain Name: Most domains cost around $10–$20 per year. You can often get your first year free if you purchase hosting from providers like Bluehost or SiteGround.
Hosting: Basic shared hosting plans typically cost between $2.95–$10 per month. As your site grows and you need more performance, you might consider VPS or managed WordPress hosting, which can cost $20 to $100+ monthly.
Themes and Plugins: WordPress offers thousands of free themes and plugins. However, premium themes usually range from $30–$80 one-time, and some plugins have annual fees, especially for e-commerce, SEO, or advanced forms. Still, many free plugins cover most basic functions.
Optional Costs: You might invest in tools like stock photos, premium page builders (like Elementor Pro), email marketing services, or a professional logo design. These extras vary widely depending on your branding and marketing goals.
In total, a beginner-friendly WordPress website can launch for under $100 in the first year if you stick to essentials. As your site grows, so will your budget, but by then, your website may already be generating leads, income, or influence making the investment worthwhile.
FAQ 3: What Are the Most Common Mistakes Beginners Make on WordPress?
Great question avoiding mistakes early on can save you time, stress, and even money. Here are the most common missteps beginners make when launching a WordPress site:
Choosing the Wrong Platform: New users often confuse WordPress.com and WordPress.org. The latter is the self-hosted version you want for full control. WordPress.com is more limited unless you pay for upgrades.
Not Backing Up the Site: Failing to back up regularly means you risk losing all your content in the event of a crash, hack, or plugin conflict. Install a free backup plugin right away, like UpdraftPlus.
Ignoring Mobile Optimization: A site that looks great on desktop may break on mobile. Use responsive themes and test how your site looks on phones and tablets during setup.
Overloading with Plugins: It’s tempting to install every shiny plugin you find, but this can slow down your site or cause conflicts. Stick to essential plugins only and delete what you don’t use.
Using “Admin” as a Username: Many people leave their login as “admin,” which is a hacker’s dream. Always create a unique username and use strong passwords.
Publishing Placeholder Content: Don’t go live with “Lorem Ipsum” or default images. First impressions count, and visitors might bounce if the site looks incomplete.
Learning from these missteps ensures your WordPress journey is smoother and more successful from the start. Take your time, research as you go, and build smart, not just fast.
FAQ 4: Can I Monetize My WordPress Website as a Beginner?
Absolutely. Many people start WordPress websites not only as a creative outlet but also as a way to generate income and the opportunities are plentiful. Even as a beginner, you can monetize your site with a few practical methods:
Affiliate Marketing: You promote products/services and earn a commission when users click your referral link and make a purchase. Plugins like Pretty Links can help manage affiliate URLs easily.
Display Ads: Google AdSense and other ad networks allow you to display ads on your site and earn money based on impressions or clicks. It’s passive and scalable once your traffic grows.
Sell Digital Products: E-books, templates, courses, or stock photos are perfect for beginners who want to earn from their knowledge or creativity. WordPress integrates well with tools like WooCommerce and Easy Digital Downloads.
Offer Services: Are you a writer, designer, or coach? Your site can serve as your portfolio and client booking hub.
Create a Membership Site: Offer exclusive content behind a paywall. With plugins like MemberPress or Restrict Content Pro, you can easily set up paid access areas.
Just remember, monetization is a long game. Focus first on providing value and building trust with your audience. Once your traffic and authority grow, income will follow.
FAQ 5: How Can I Make My WordPress Website Look More Professional?
Even as a beginner, you can create a polished, professional website that rivals big brands. The secret lies in consistency, design choices, and user experience.
Use a Clean, Responsive Theme: Choose a well-coded theme with modern design, mobile responsiveness, and regular updates. Astra, Kadence, and GeneratePress are excellent choices.
Invest in Quality Visuals: Replace blurry or generic images with high-resolution, relevant visuals. Tools like Canva can help you create branded graphics easily.
Stick to a Brand Style: Choose 2–3 fonts and a cohesive color palette that reflects your brand personality. Use them consistently across all pages.
Write Clear, Engaging Copy: Avoid jargon and be direct with your messaging. Break up text with headings and use bullet points for readability.
Add Trust Signals: Include testimonials, certifications, social proof, and contact information. A privacy policy and about page can also increase credibility.
Pay Attention to Speed: A slow site screams amateur. Use caching plugins, optimize images, and choose fast hosting to keep your site snappy.
With thoughtful design and strategic content, your WordPress site can look highly professional even if you’re just starting out. First impressions matter—make yours count.